免责声明: 本文所述内容仅供技术学习和研究使用,不构成任何形式的非法行为指导。请读者严格遵守所在地区的法律法规,自行判断和承担使用相关技术可能带来的风险。作者不对因使用本文内容而产生的任何法律责任承担责任。
Preface
As we all know, overseas websites like Google and Twitter cannot be directly accessed in mainland China. We also know that you can access these websites by connecting to a VPN. As for the details, most people don’t know, and there is really no need to know. But one thing we must understand is that an important reason why VPN can work is that GFW does not block all overseas websites. It is for this reason that we can find loopholes to exploit.
Technically speaking, VPN ≠ circumventing the Great Firewall. However, in mainland China, VPN has become synonymous with circumventing the Great Firewall, so I won’t go into details here.
On the Internet, IP addresses are our “identity cards”. These banned overseas websites also have their own IP addresses, but unfortunately they are blocked by GFW, so we cannot access them directly. There are still some IP addresses that are not blocked and we can access them. A series of wall-climbing technologies are built on this basis.
Assume there is an IP address A, which is not blocked by GFW, and as a member of the Internet, A can access those blocked websites. We can send the request to access Google to A, and A will help us access it and then send the result to us. This is the principle of Proxy, and it is also the basis for a series of wall-circumvention technologies to be realized.
Buy a VPS
First of all, we need an IP address that is not blocked. Purchasing an overseas VPS can meet this requirement. A VPS is actually a cloud server located overseas.
There are many VPS providers, such as BandWagon, Vultr, CloudCone, etc. This article takes Vultr as an example, and other manufacturers are similar.
Register and log in to Vultr, click the Deploy button in the upper right corner and follow the steps below to deploy a VPS.
Choose VPS Type and Location
Select Shared CPU as the type.
The location depends on your needs. Here we take Los Angeles, USA as an example.

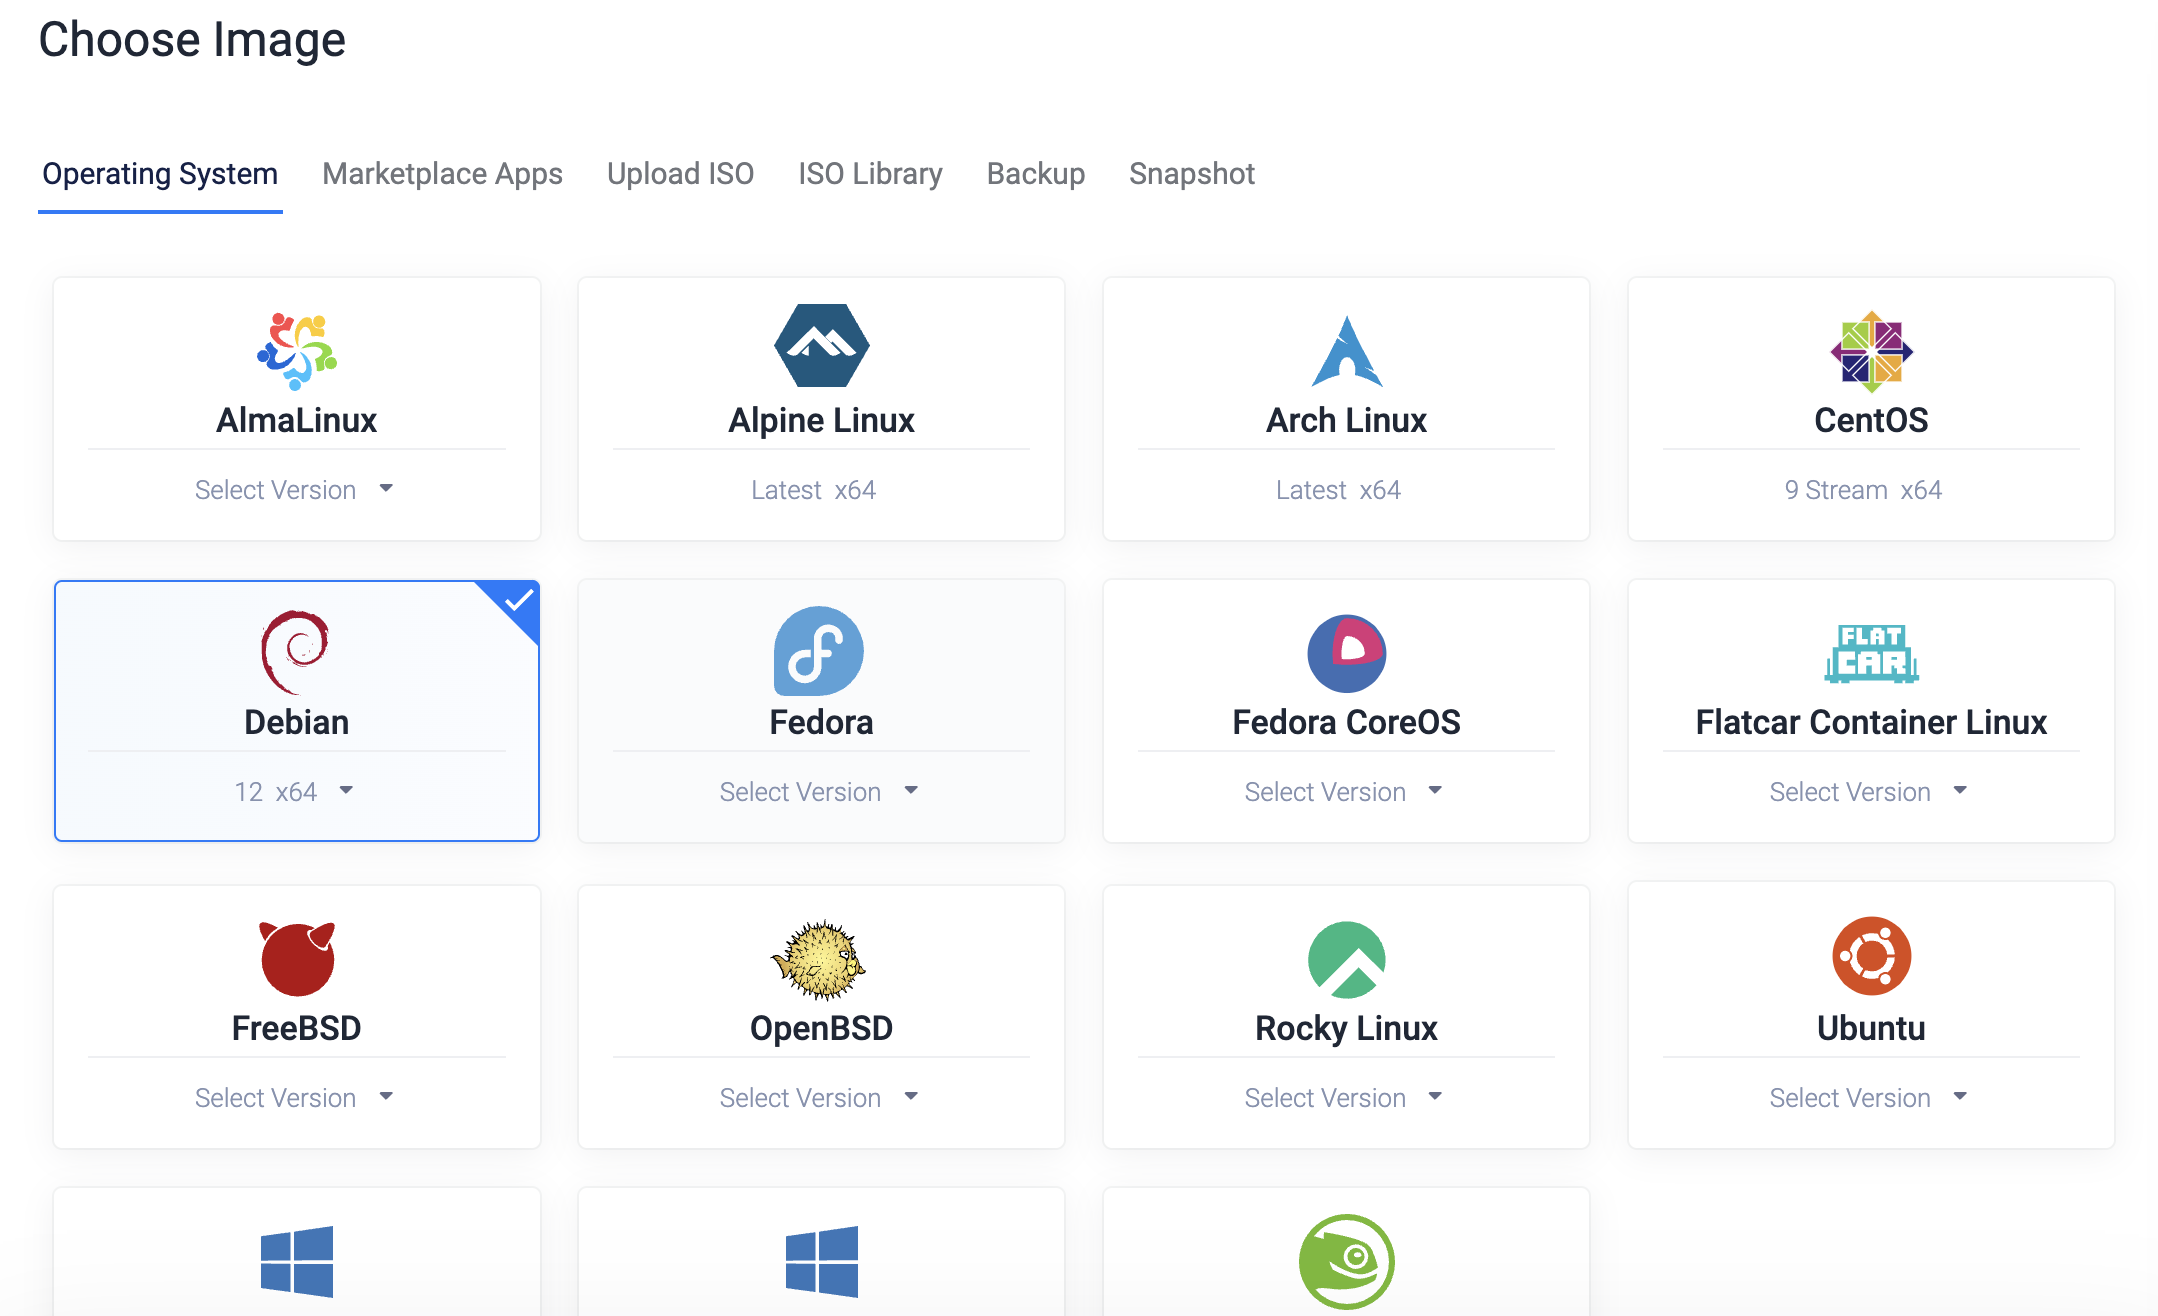
Select System Image
Choose an operating system. For a server, you should naturally choose Linux. Debian is recommended as it is more stable.
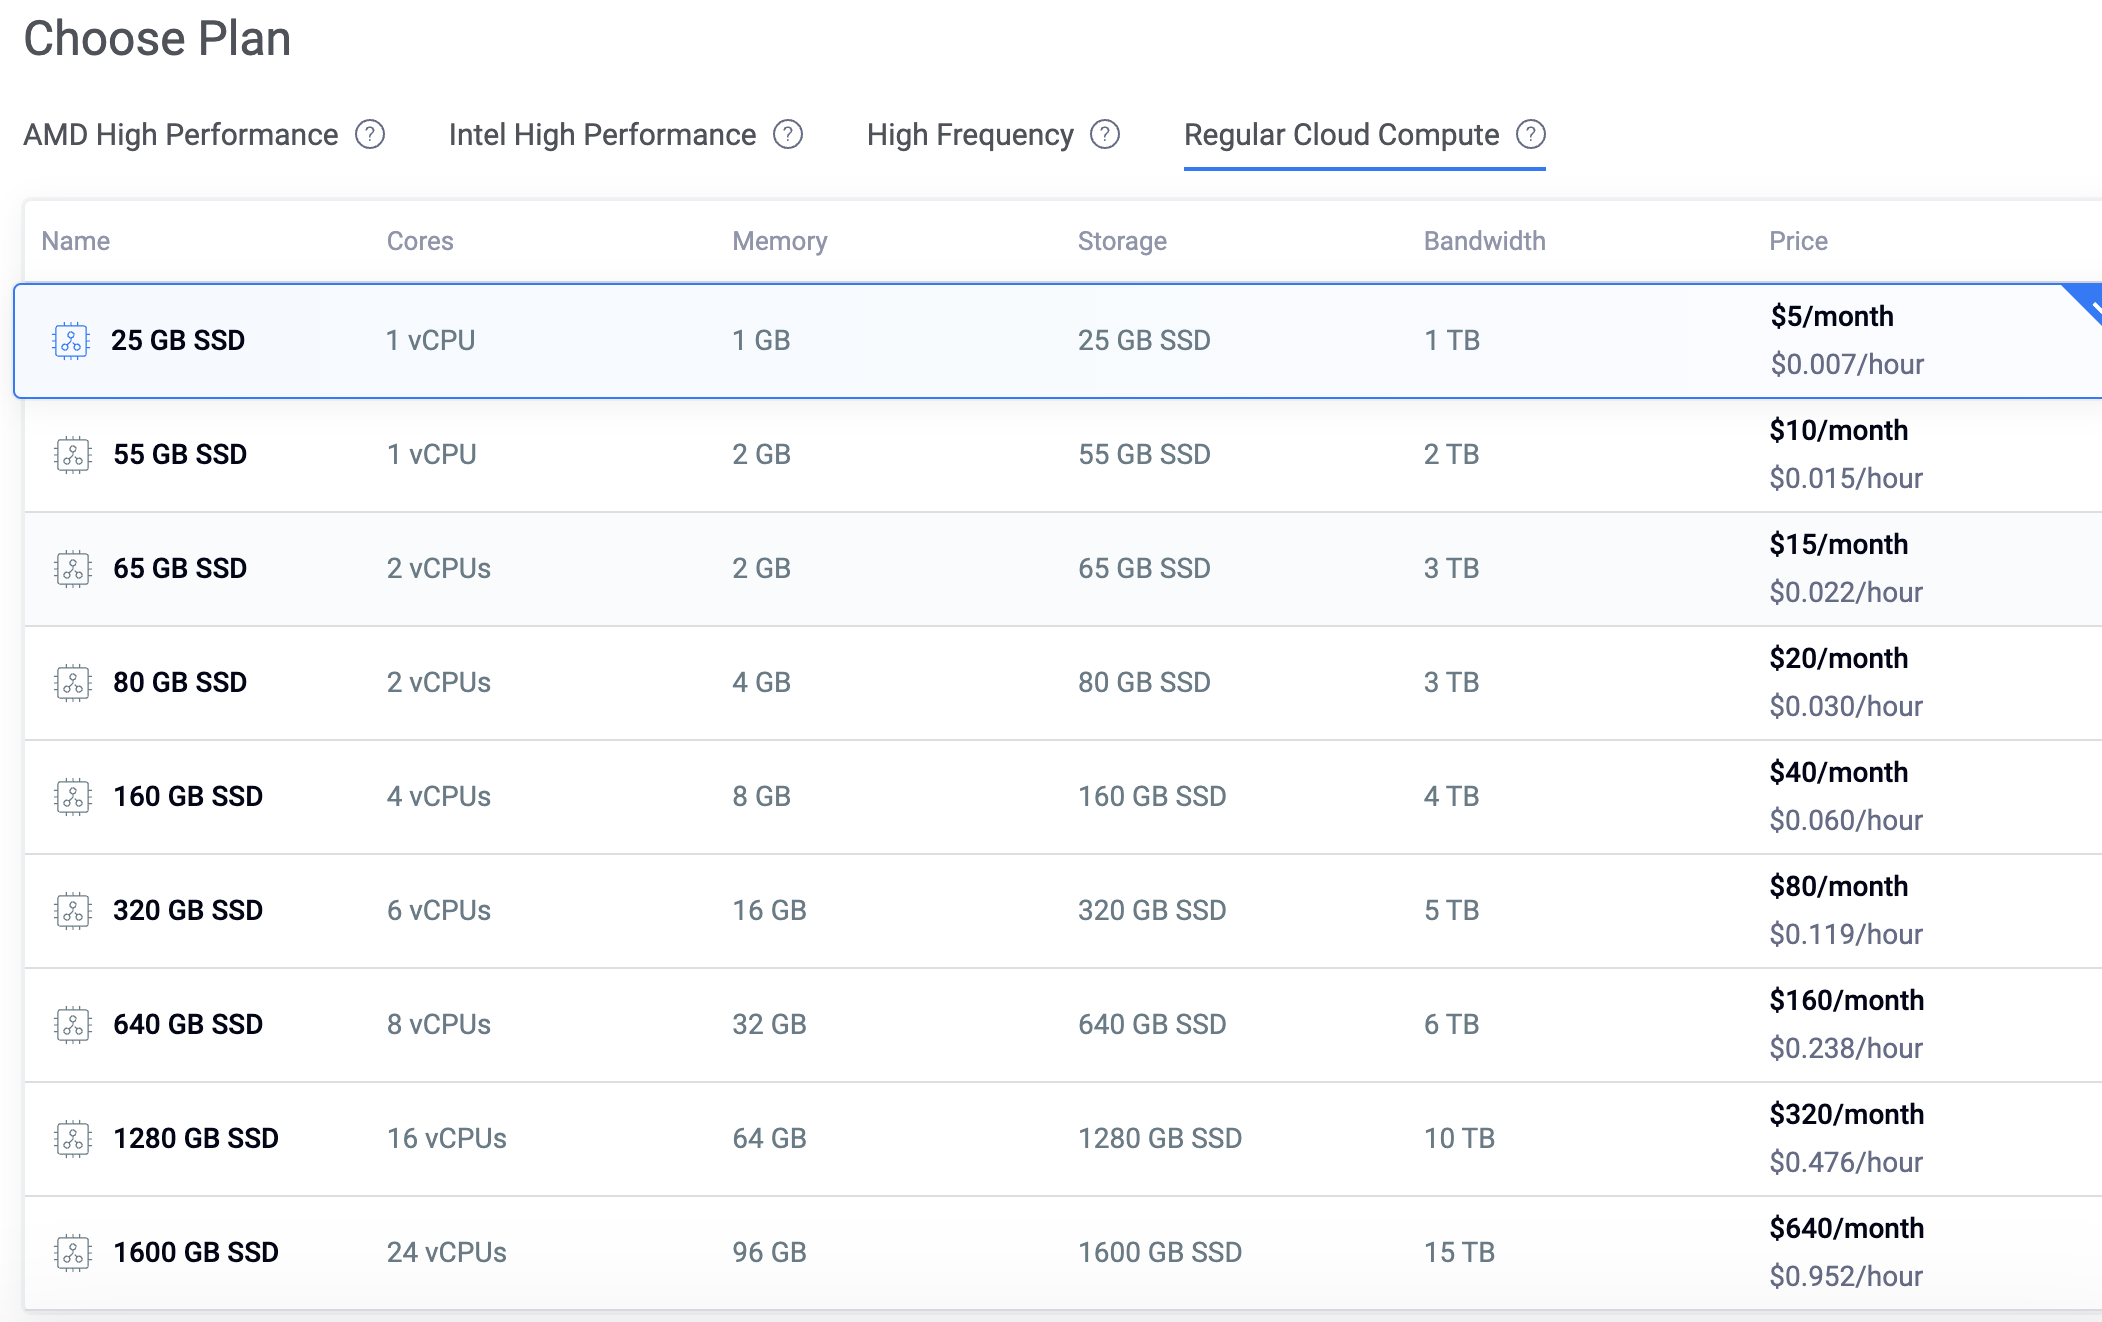
Choose a Plan
Choose a configuration based on your needs. The higher the configuration, the more expensive it is. Here we choose the cheapest plan of 5$/month.
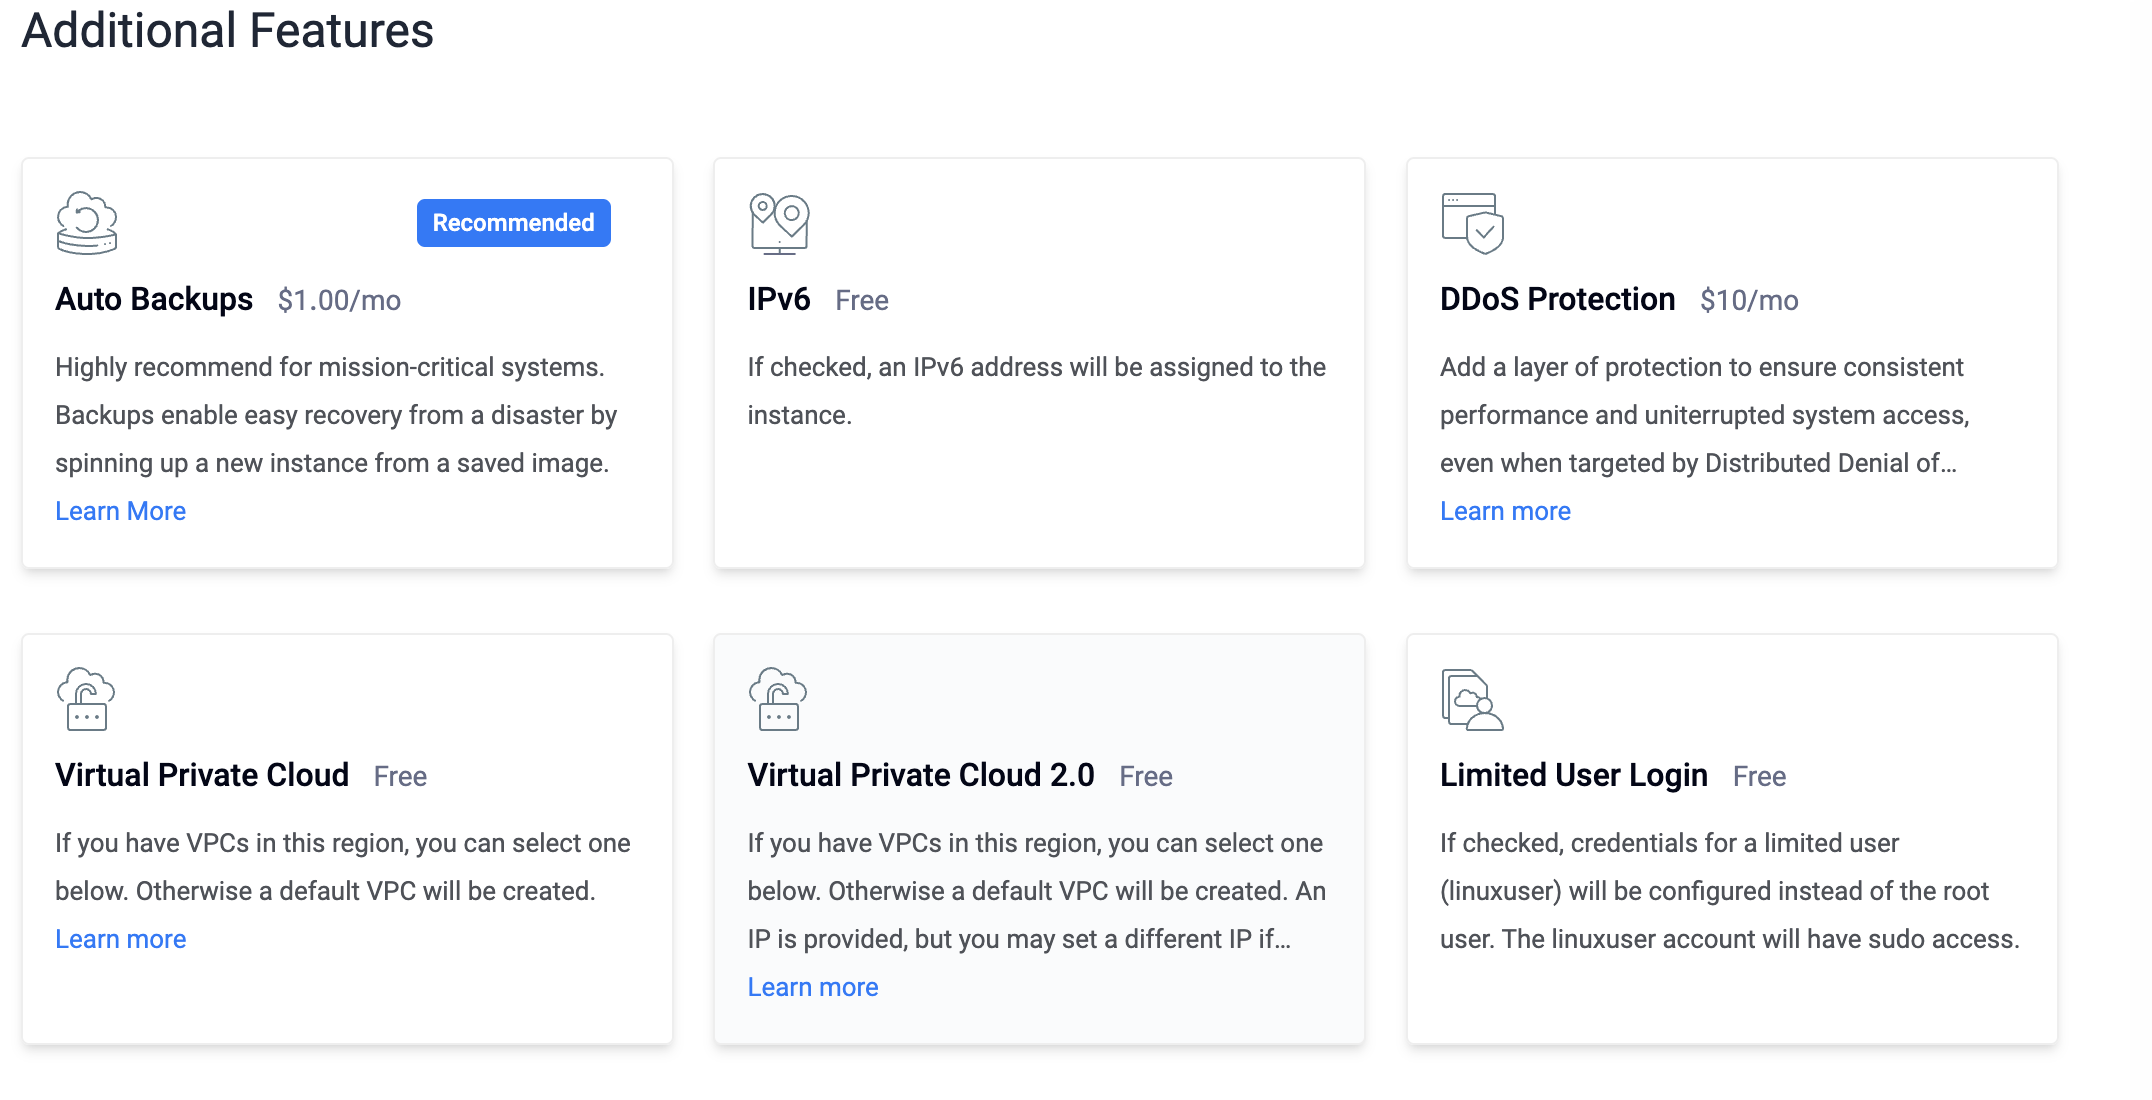
Other Configs
Remove Auto Backups, it costs money.
Remove IPv6, it is not needed.
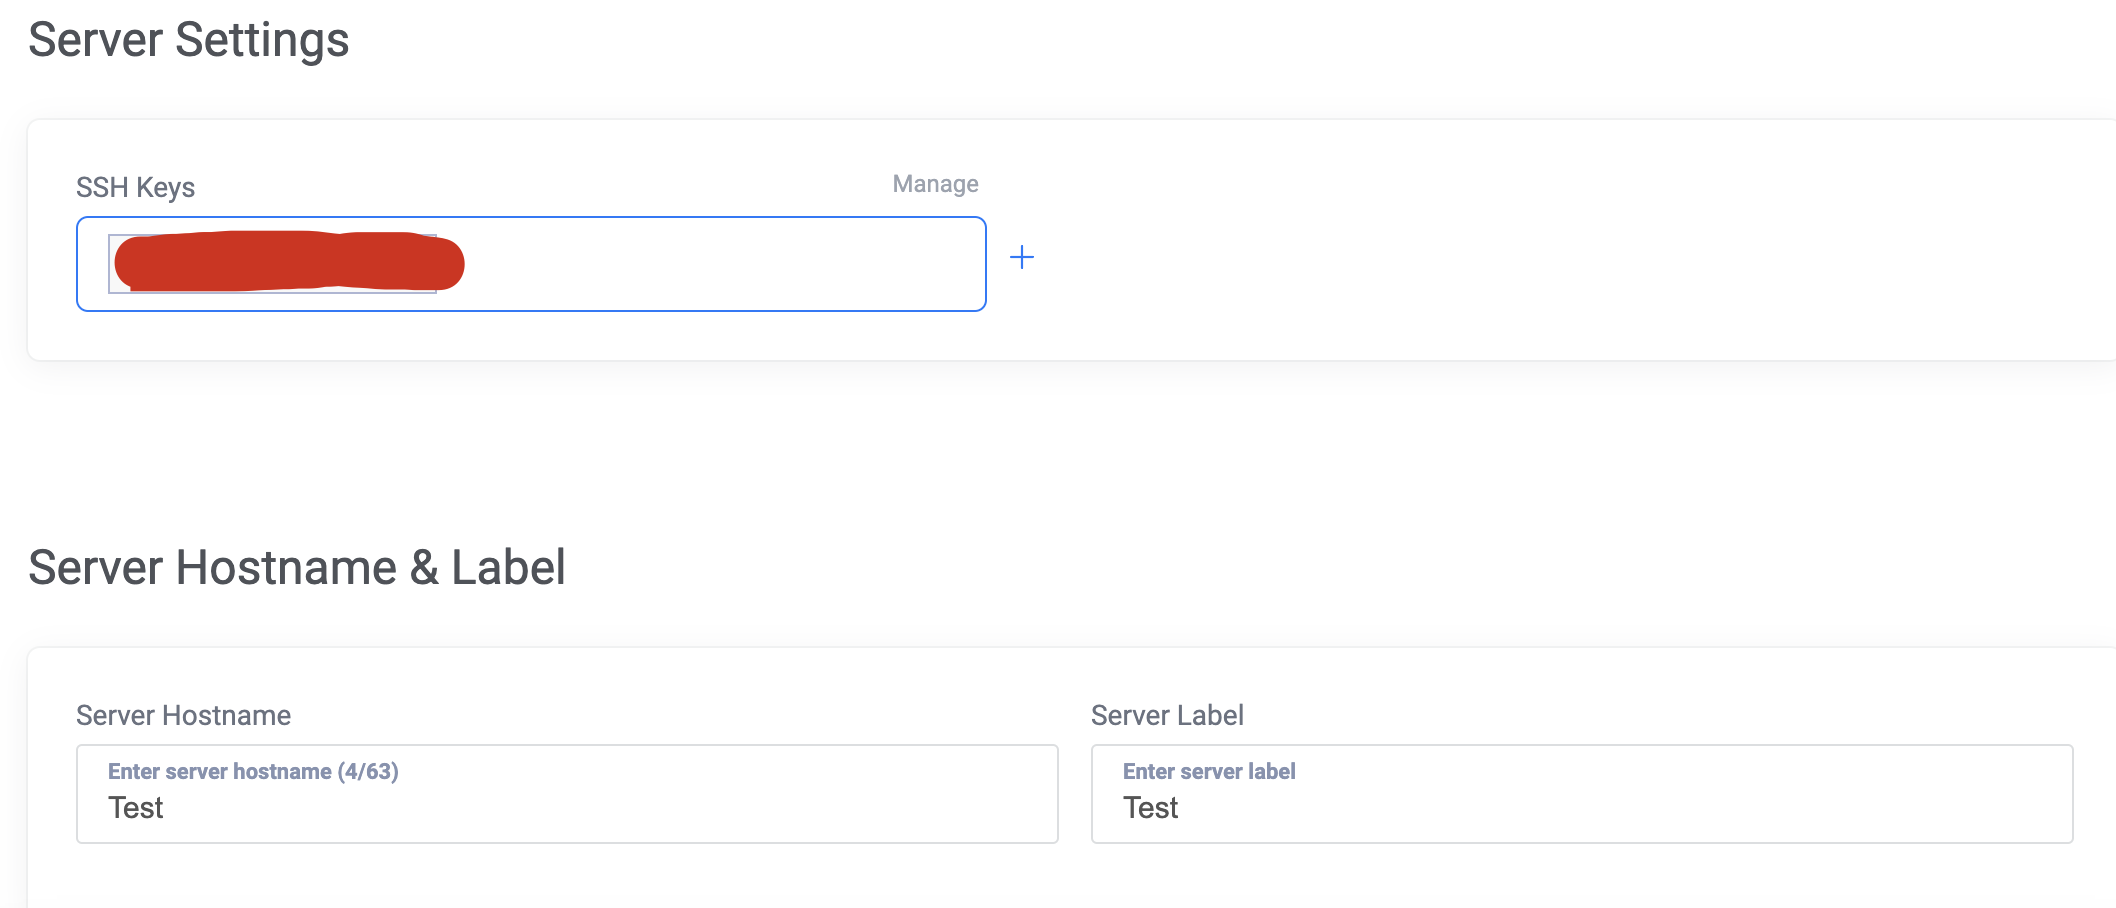
Here you can upload the SSH key and transfer the public key of your local computer ~/.ssh/ to Vultr. In this way, you can log in directly with the key after the deployment is completed without entering a password, which is much more convenient.
Set the host name in Server Hostname. You can give it a name of your own. This article takes Test as an example.
Place an order
Now it’s ready. Confirm the quantity and price, and click Deploy Now to start deployment.
The deployment process may take several minutes, so be patient.

Deployment Completed
When the Status changes to Running, the deployment is complete. The coded part is the public IP address of this VPS, which is represented by 100.200.300.400 below.

Check if the IP is blocked
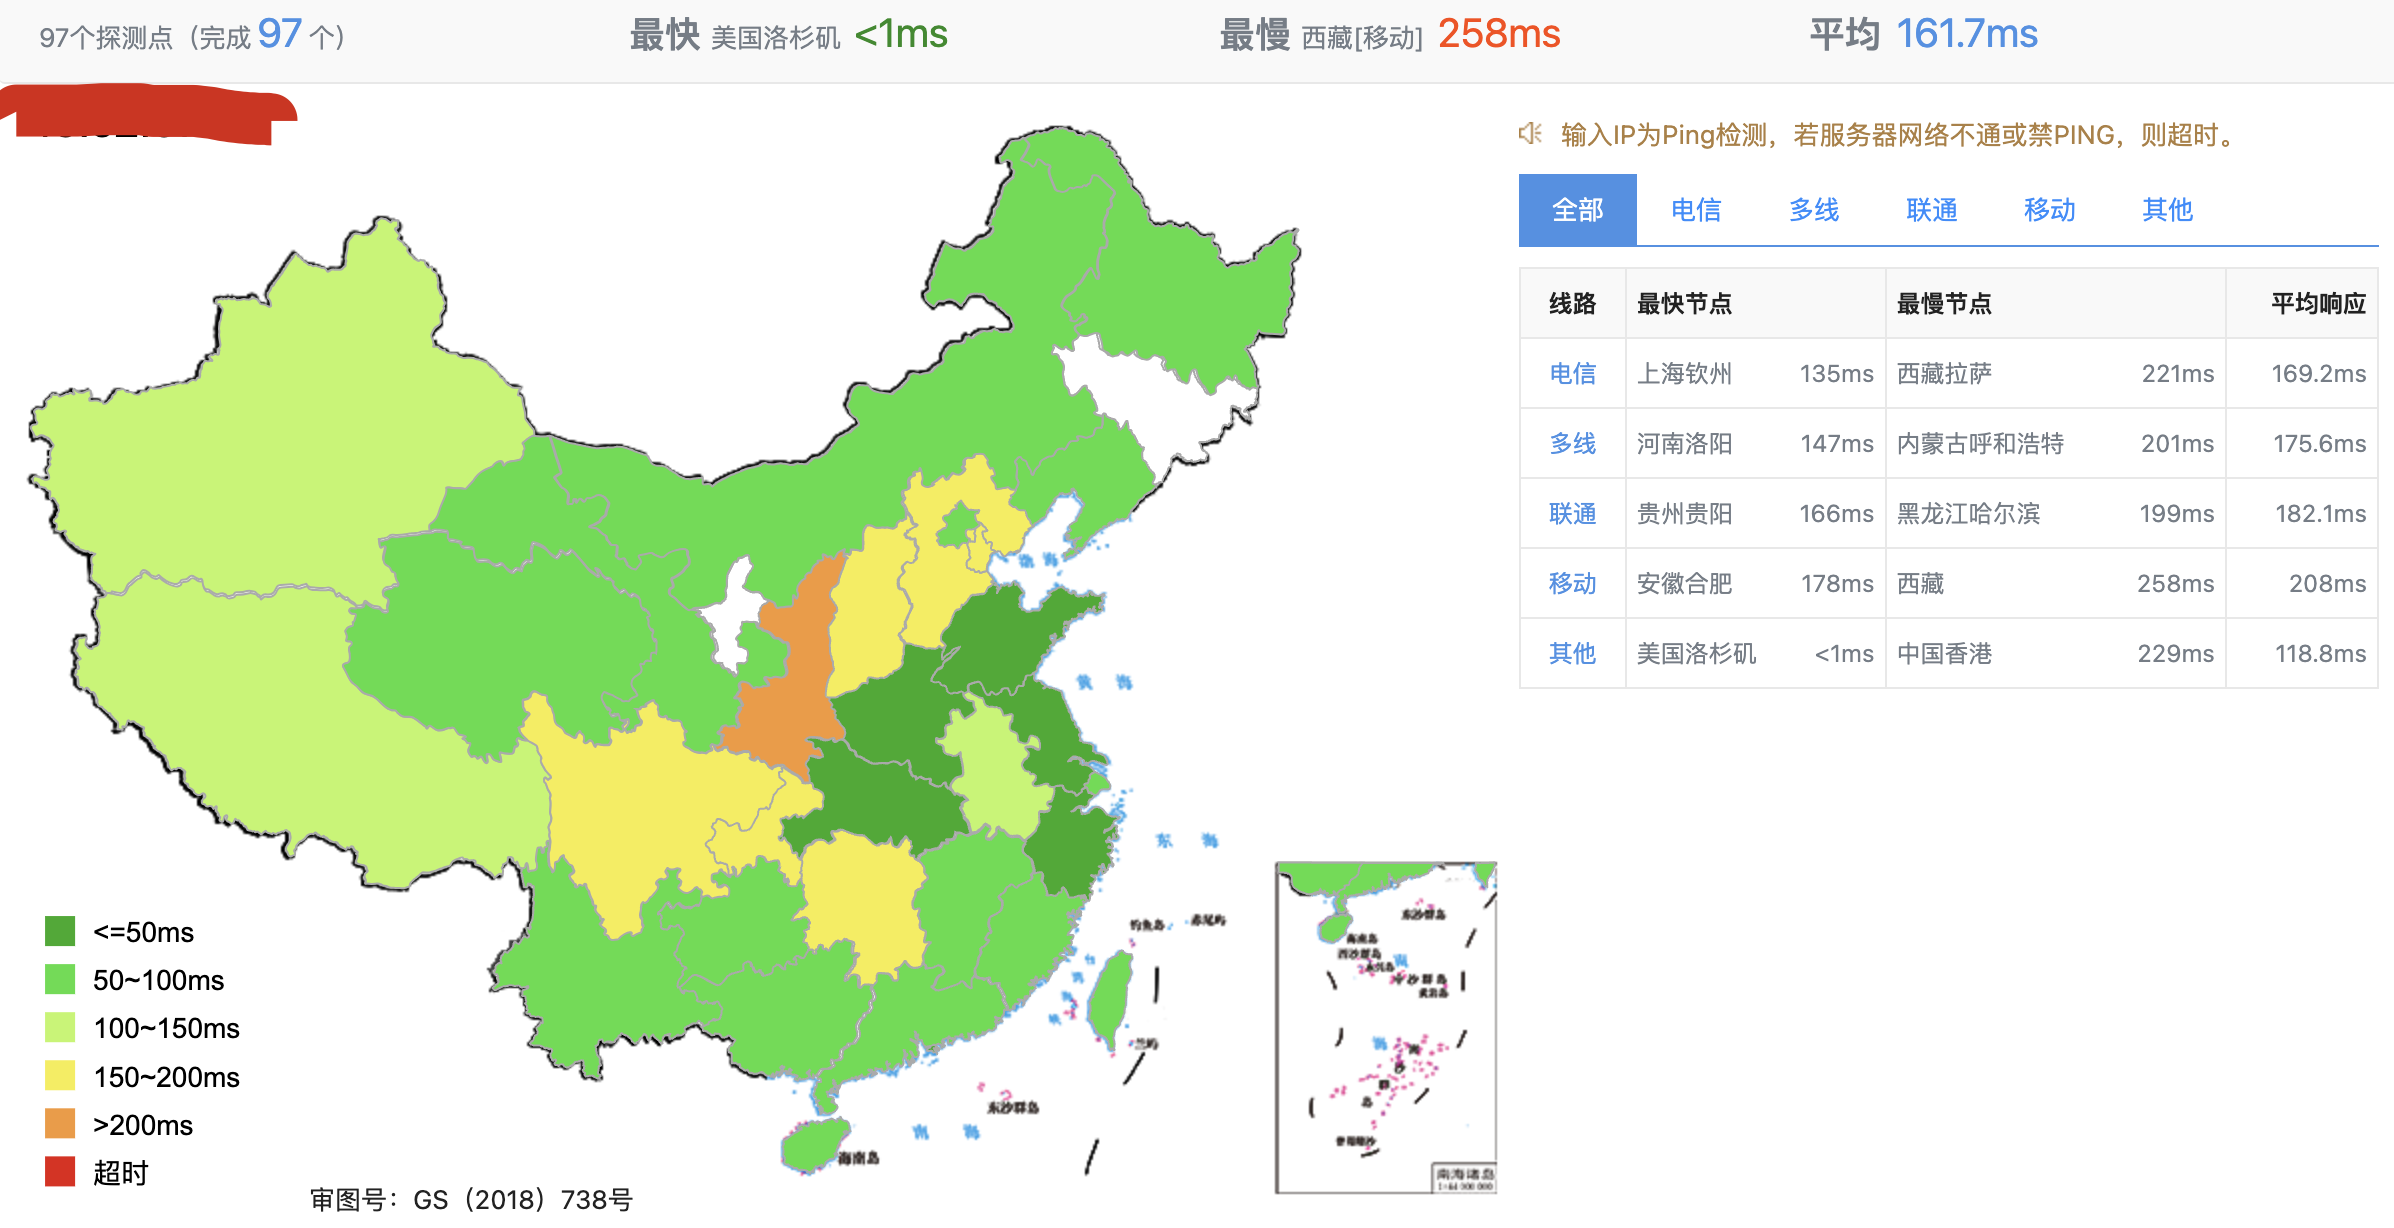
Enter your IP address in Webmaster Tools - Ping Detection and click Ping Detection. If most of the information is green, it means that your IP address is not blocked and you can use it with confidence.。
If it is all red, it means that this IP address has been blocked and cannot be used. According to the policy of your VPS manufacturer, find a way to change the IP until it is available.
Configuring the VPS
SSH login to VPS
To configure your VPS, first log in to your VPS via SSH. Open your terminal tool and enter the following command to log in to your VPS.
|
|
SSH logging into a Linux server is a basic operation and will not be explained in detail.
Update
Update your package index and then upgrade all installed packages to their latest versions, ensuring your system is up to date with the latest features and security patches.
|
|
Enable ufw firewall
The first thing to do after logging in is to enable the ufw firewall. First, confirm whether ufw has been installed. Execute the following command. If the ufw version number is returned, it means it has been installed.
|
|
If ufw is not installed, install it yourself.
Run the following command to configure ufw.
|
|
Other common ufw commands:
|
|
Change SSH default port
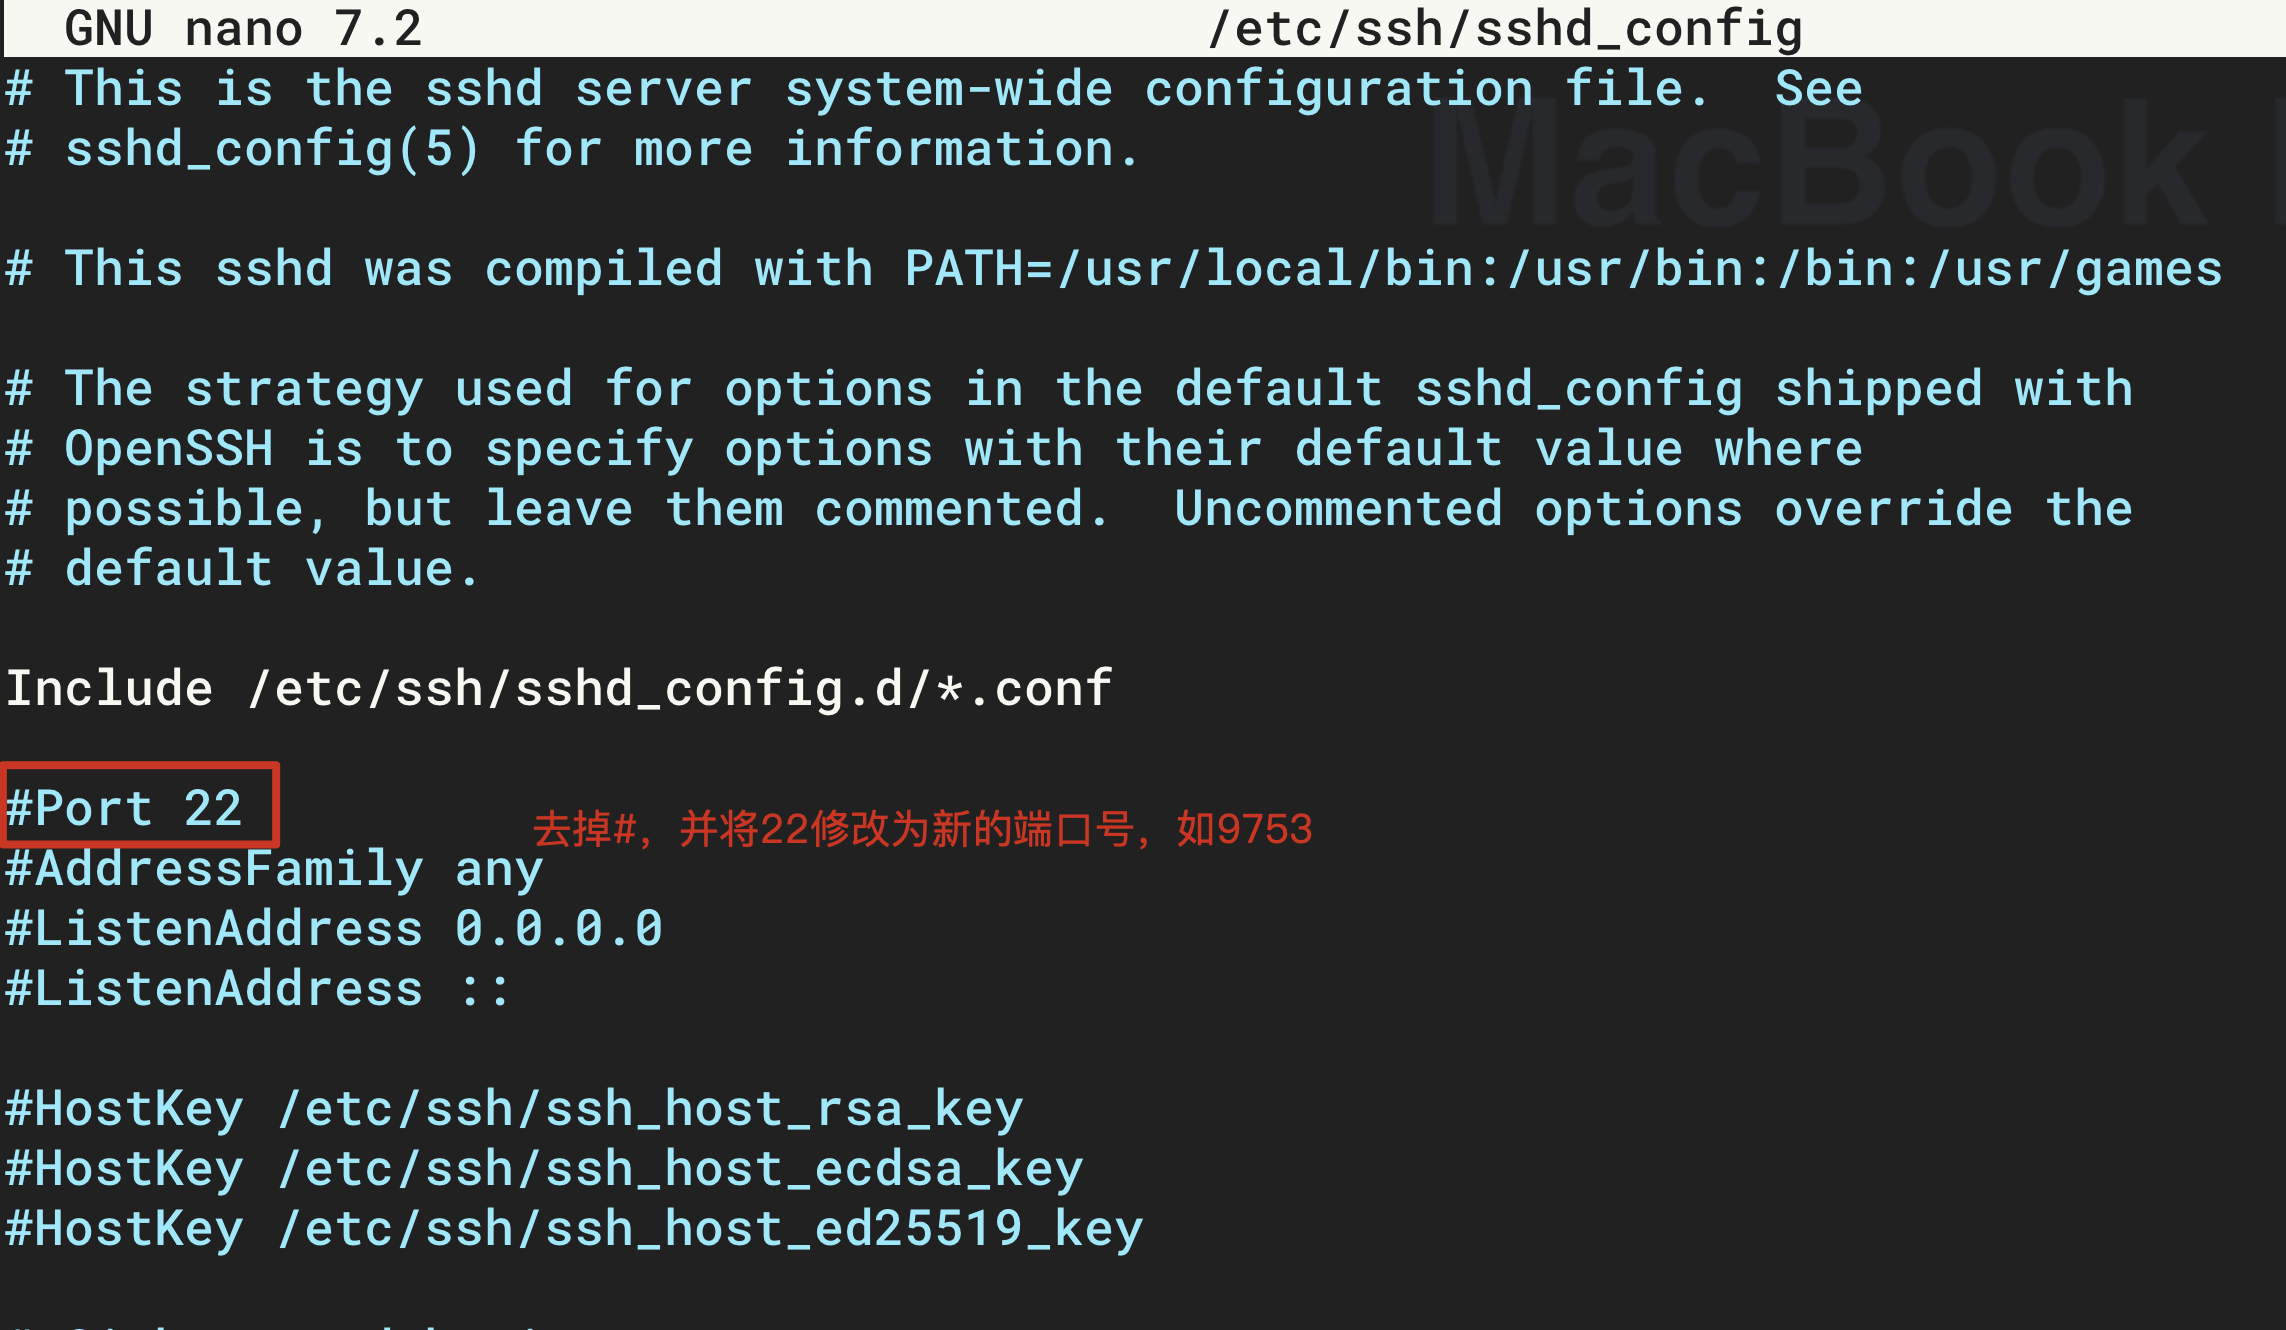
- Open an editor such as nano or vim and open the file
/etc/ssh/sshd_config
|
|
- Find the item
Portin the opened file, remove the comment symbol#, and change 22 to the new port number (1025-65535). This article takes 9753 as an example.
- Restart the ssh service for the changes to take effect.
|
|
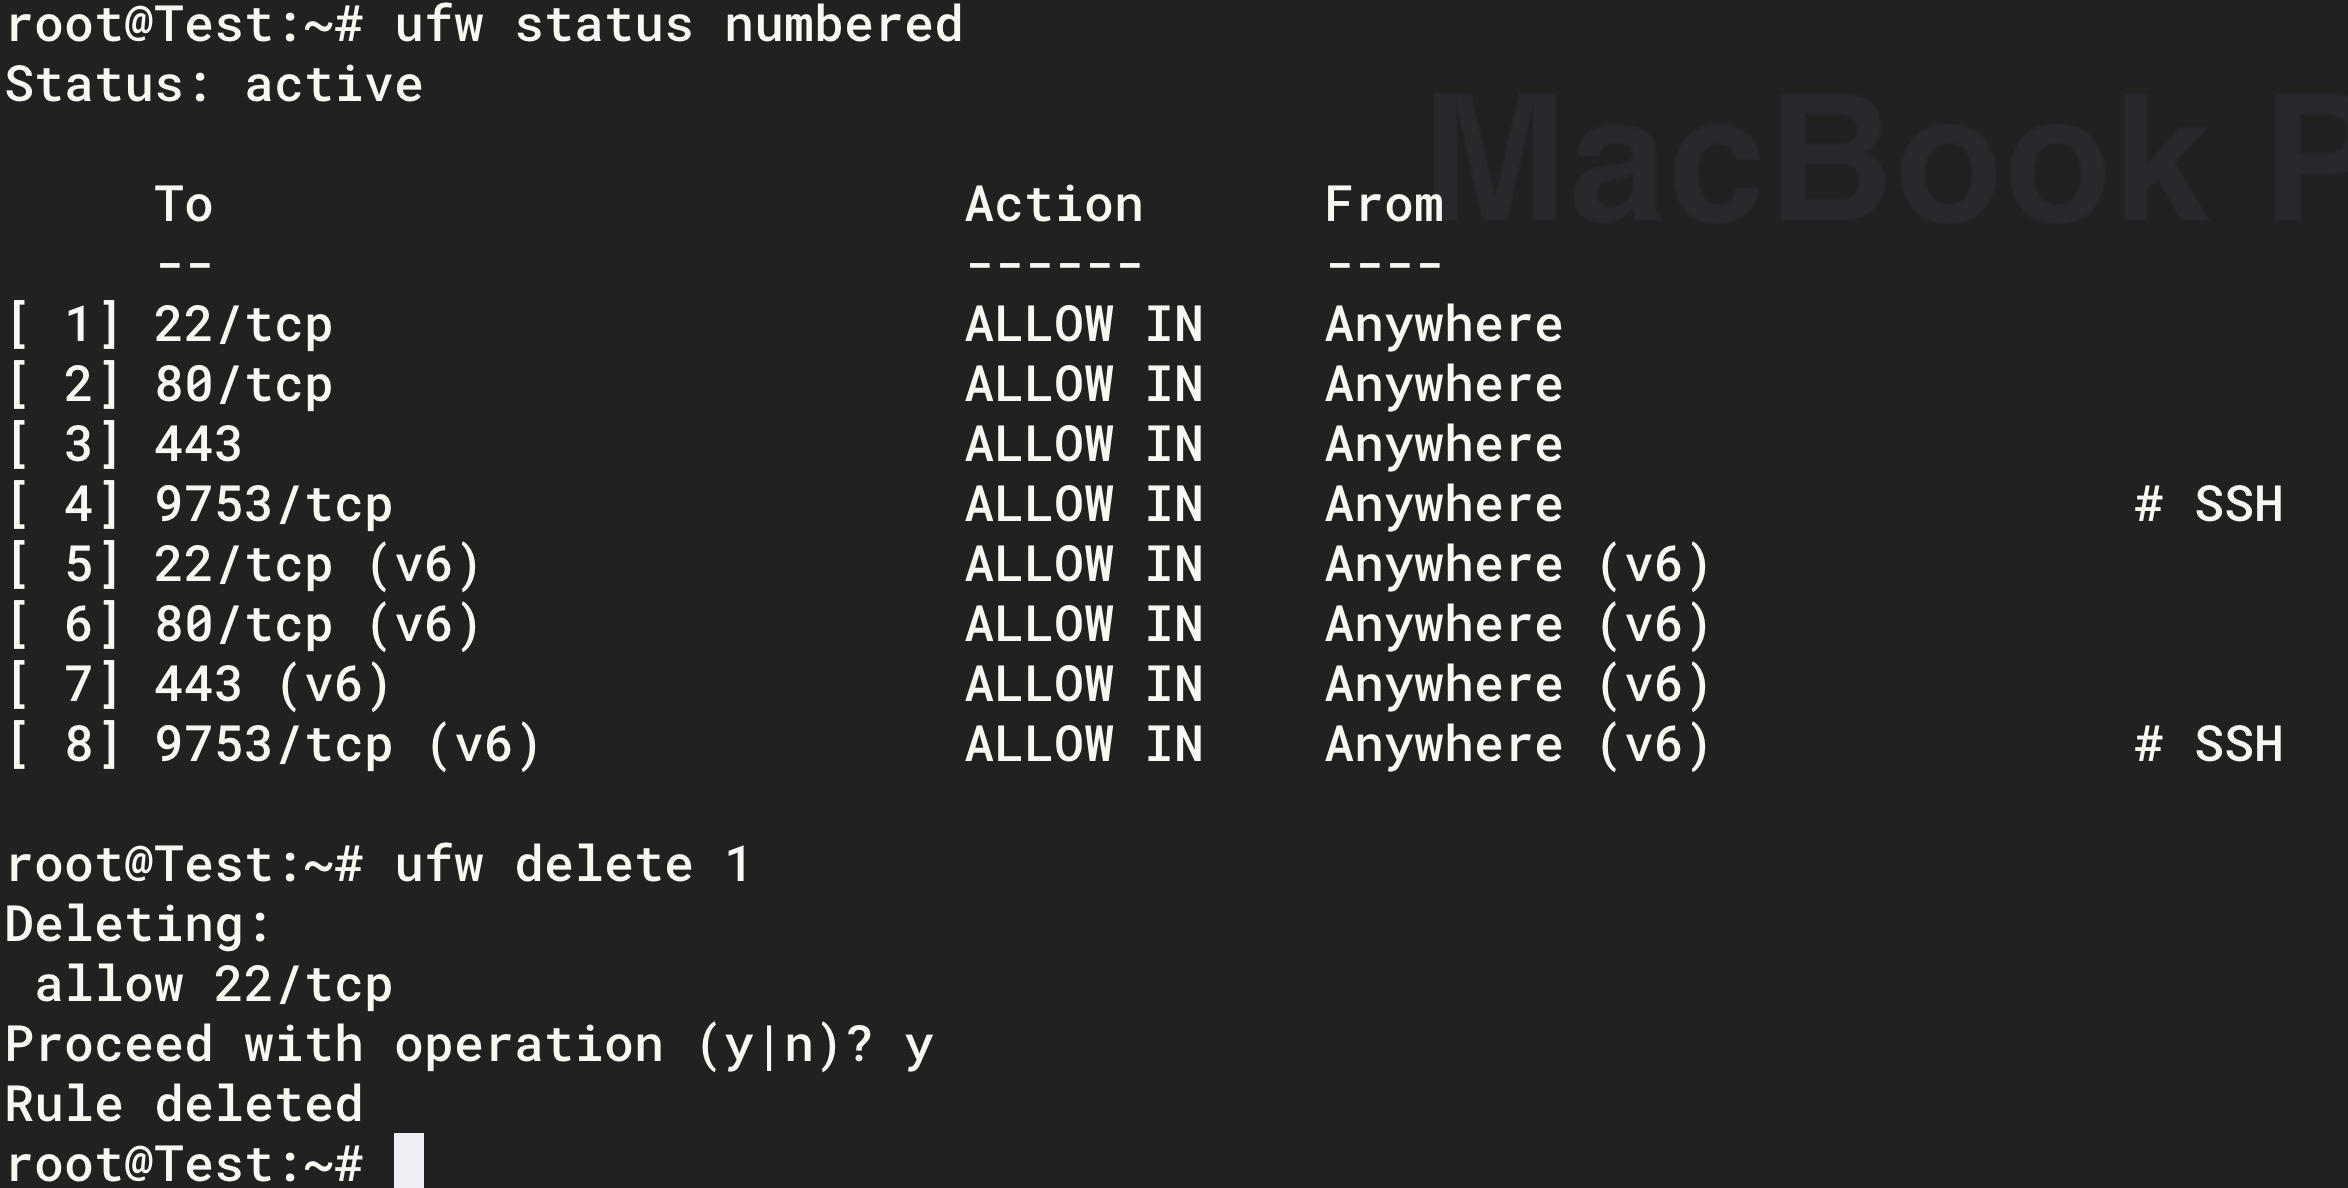
- Open new port number on firewall
|
|
- Delete the original port 22 in the firewall. The figure below deletes
22/tcp. Use the same method to delete22/tcp(v6).
-
Test the new port number login
Note: To ensure that you do not lose connection, please do not close the current ssh login window! Instead, open another window to test!
In a new terminal window, log in to the VPS using the new port number.
1ssh root@100.200.300.400 -p 9753
Set up key-only login
- Upload the public key to the VPS.
|
|
- Disable password login
|
|
Find the item PasswordAuthentication, uncomment it and change it to no, then save and exit.

For some systems, it is useless to change only this one, and you also need to change the following one. If the system does not have this file, ignore this step.
|
|
Similarly, uncomment the PasswordAuthentication option and change it to no, then save and exit.
- Restart the ssh service for the changes to take effect.
|
|
- Test key login.
Open a new terminal and log into the VPS using the following command.
|
|
Change
path/to/yourprivatekeynameto the path of the private key corresponding to the public key used by the VPS. Usually it is under~/.ssh/.
Create a new common user
- Execute the following command to create a new user. Follow the prompts to complete the process.
|
|
Give the new user a name. This article uses
leoas an example.
- Add new user
leotosudo.
|
|

- Give the public key to the new user.
|
|
This way new users can log in using the key.
Disable root login
Open /etc/ssh/sshd_config, find the item PermitRootLogin, uncomment it and change yes to no.
|
|
Restart the sshd service for the changes to take effect.
|
|
In this way, the root user will not be able to log in, and the leo user will be used to manage the VPS in the future.
Install Fail2Ban
|
|
The above configuration means that an IP address that attempts to log in to ssh five times within 600 seconds will be sentenced to 7200 seconds in prison.
Fail2Ban common commands:
|
|
At this point, the VPS security configuration has been completed. The next step is to actually build a proxy.
Xray installation and configuration
It is not recommended to use any third-party one-click scripts. Who knows if there is anything hidden in them? The official documentation is detailed enough and the installation and configuration are simple enough. For details of this part, please refer to Official Documentation。
Install Xray
The GitHub repository Xray-install is the installation method provided by Xray official. The official installation script can be found on the repository’s README page:
|
|
This command is also used to update the new version later.
One-click installation, simple enough.
Config Xray
-
Generate a valid
UUIDand save it for future use (UUIDcan be roughly understood as an ID that is almost never repeated, like a fingerprint).1xray uuid
This
uuidshould be retained and will be used in the subsequent configuration. -
Modify the Xray configuration file.
1sudo nano /usr/local/etc/xray/config.jsonPaste the following content. You only need to modify
portandid. In this article,porttakes12345as an example, andidtakes the one generated in the previous step as an example.1 2 3 4 5 6 7 8 9 10 11 12 13 14 15 16 17 18 19 20 21 22 23 24 25 26 27 28 29 30 31 32 33 34 35 36 37 38 39 40 41# The original version, VMess+Kcp, cannot access the ChatGPT client { "log": { "loglevel": "warning", "access": "/var/log/xray/access.log", // This is the path for Linux "error": "/var/log/xray/error.log" }, "inbounds": [ { "port": 12345, // Server listening port "protocol": "vmess", // Main Incoming Protocol "settings": { "clients": [ { "id": "0061c282-49f7-41d7-b223-0a9b6d8675dd", // uuid,The client and server must be the same "alterId": 0 } ] }, "streamSettings": { "network": "kcp", //Here, kcp can also be written as mkcp. Both writing methods have the same effect. "kcpSettings": { "uplinkCapacity": 15, "downlinkCapacity": 100, "congestion": true, "readBufferSize": 1, "writeBufferSize": 1, "header": { "type": "wireguard" } } } } ], "outbounds": [ { "protocol": "freedom", // Main Outgoing Protocol "settings": {} } ] } -
Open the port number specified in the configuration file.
1 2sudo ufw allow 12345/tcp comment "Xray" sudo ufw allow 12345/udp comment "Xray"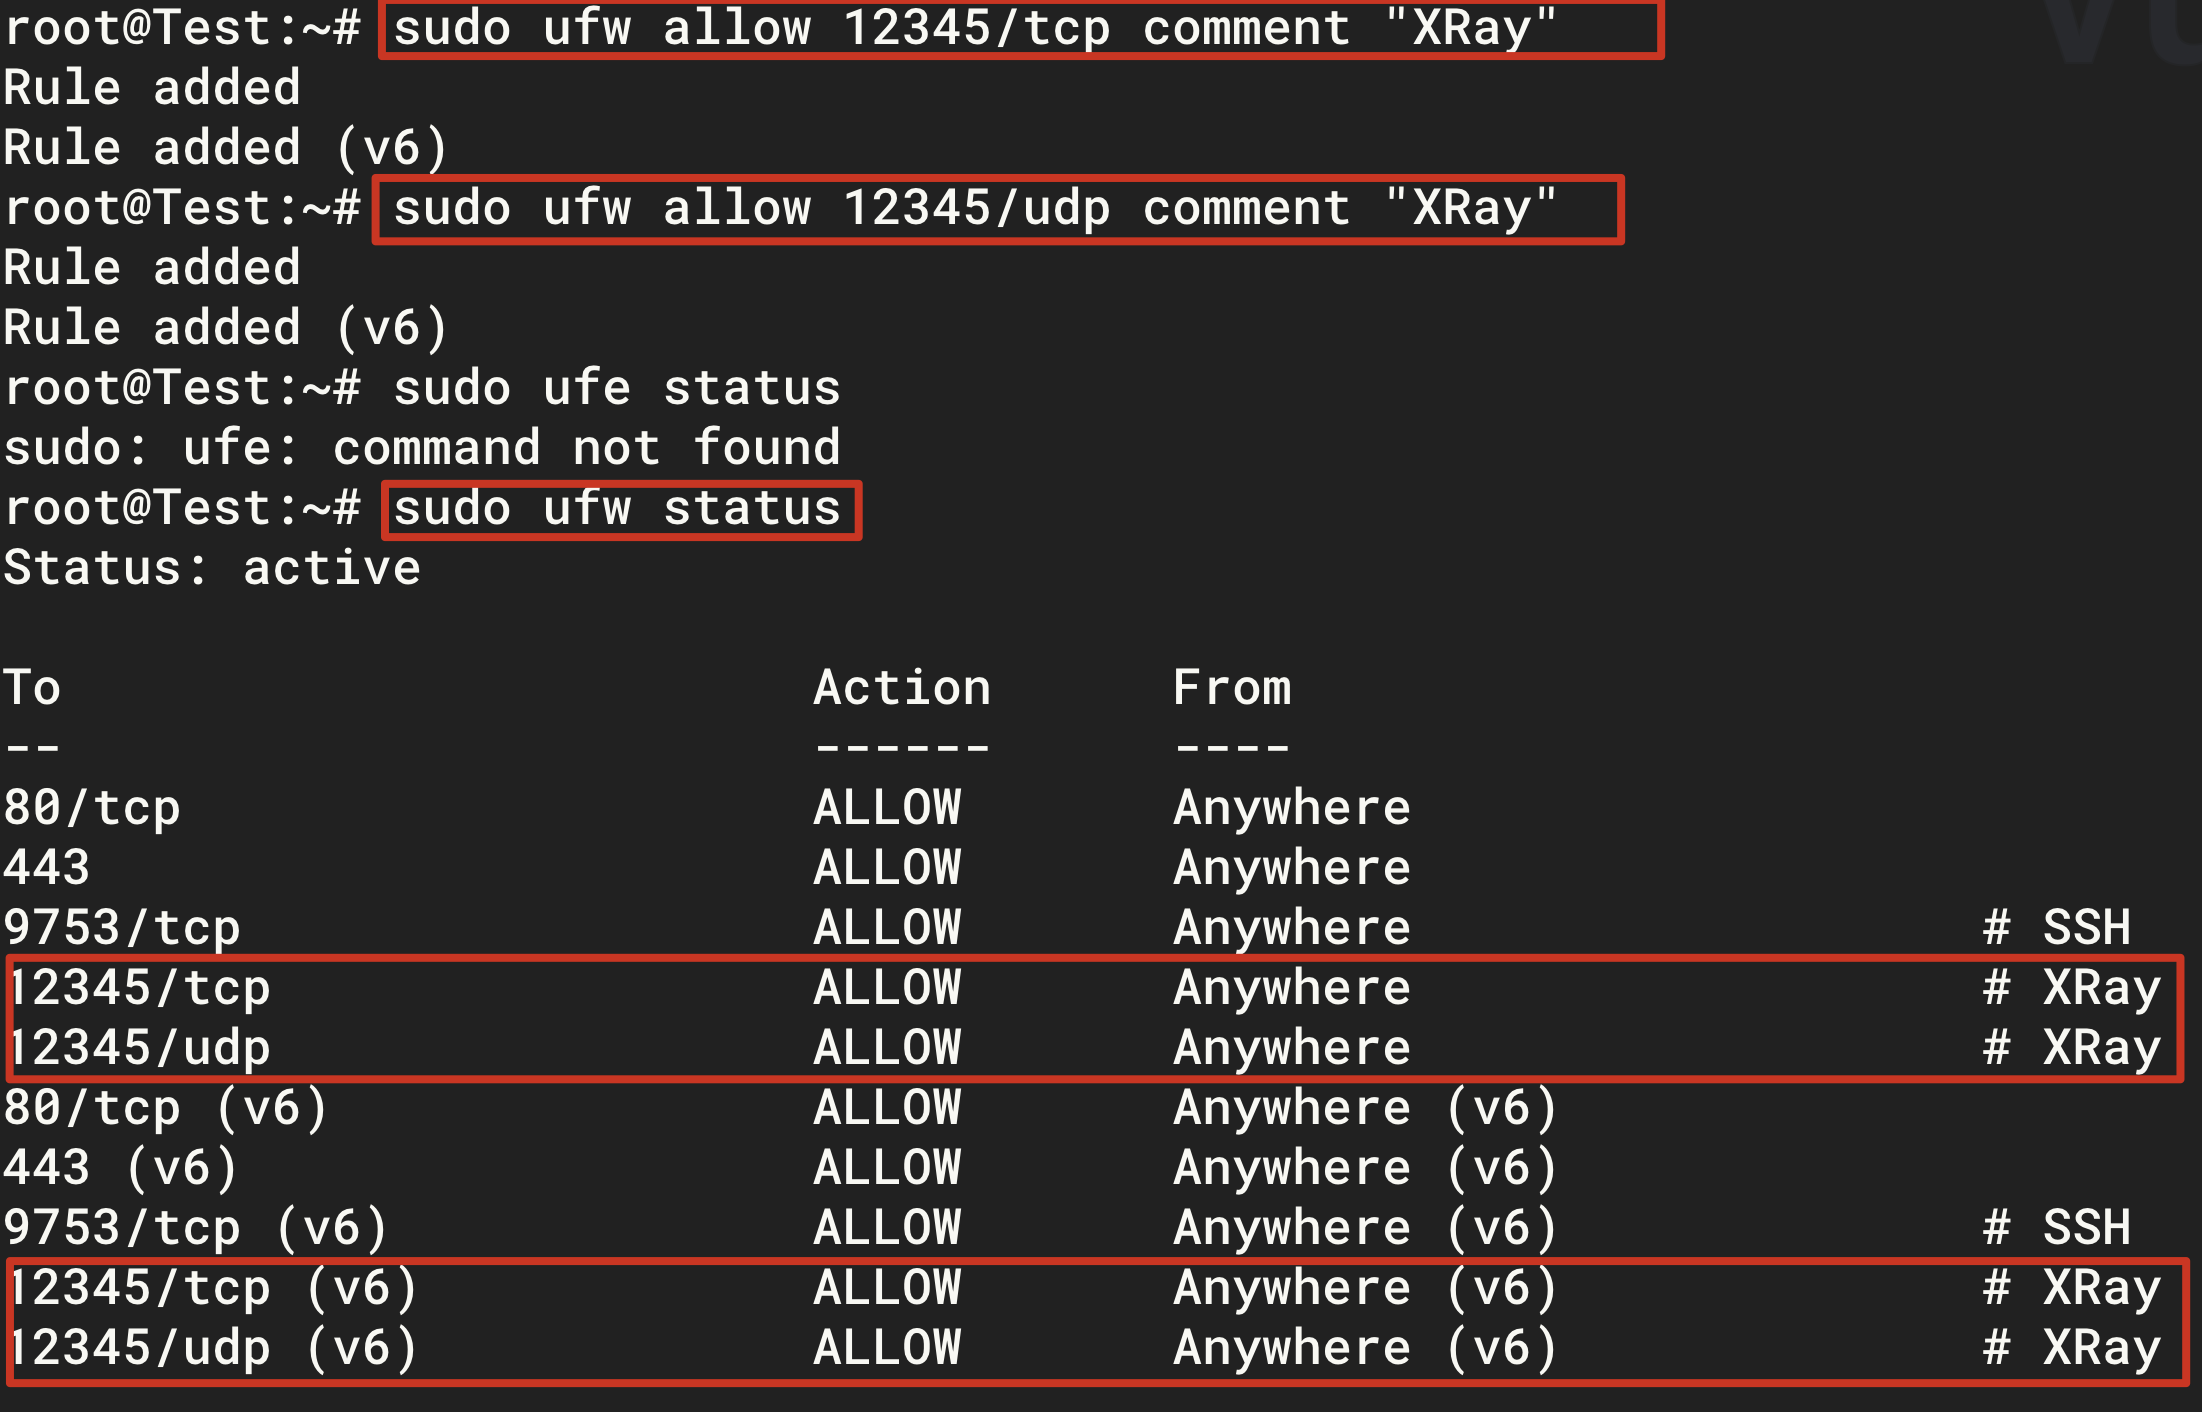
-
Start Xray
1 2 3 4 5 6# Start Xray sudo systemctl start xray # Set Xray to start at boot sudo systemctl enable xray # Check Xray status sudo systemctl status xrayWhen you see the green
active(running)as shown in the figure below, it means that Xray has been successfully started and the server is configured.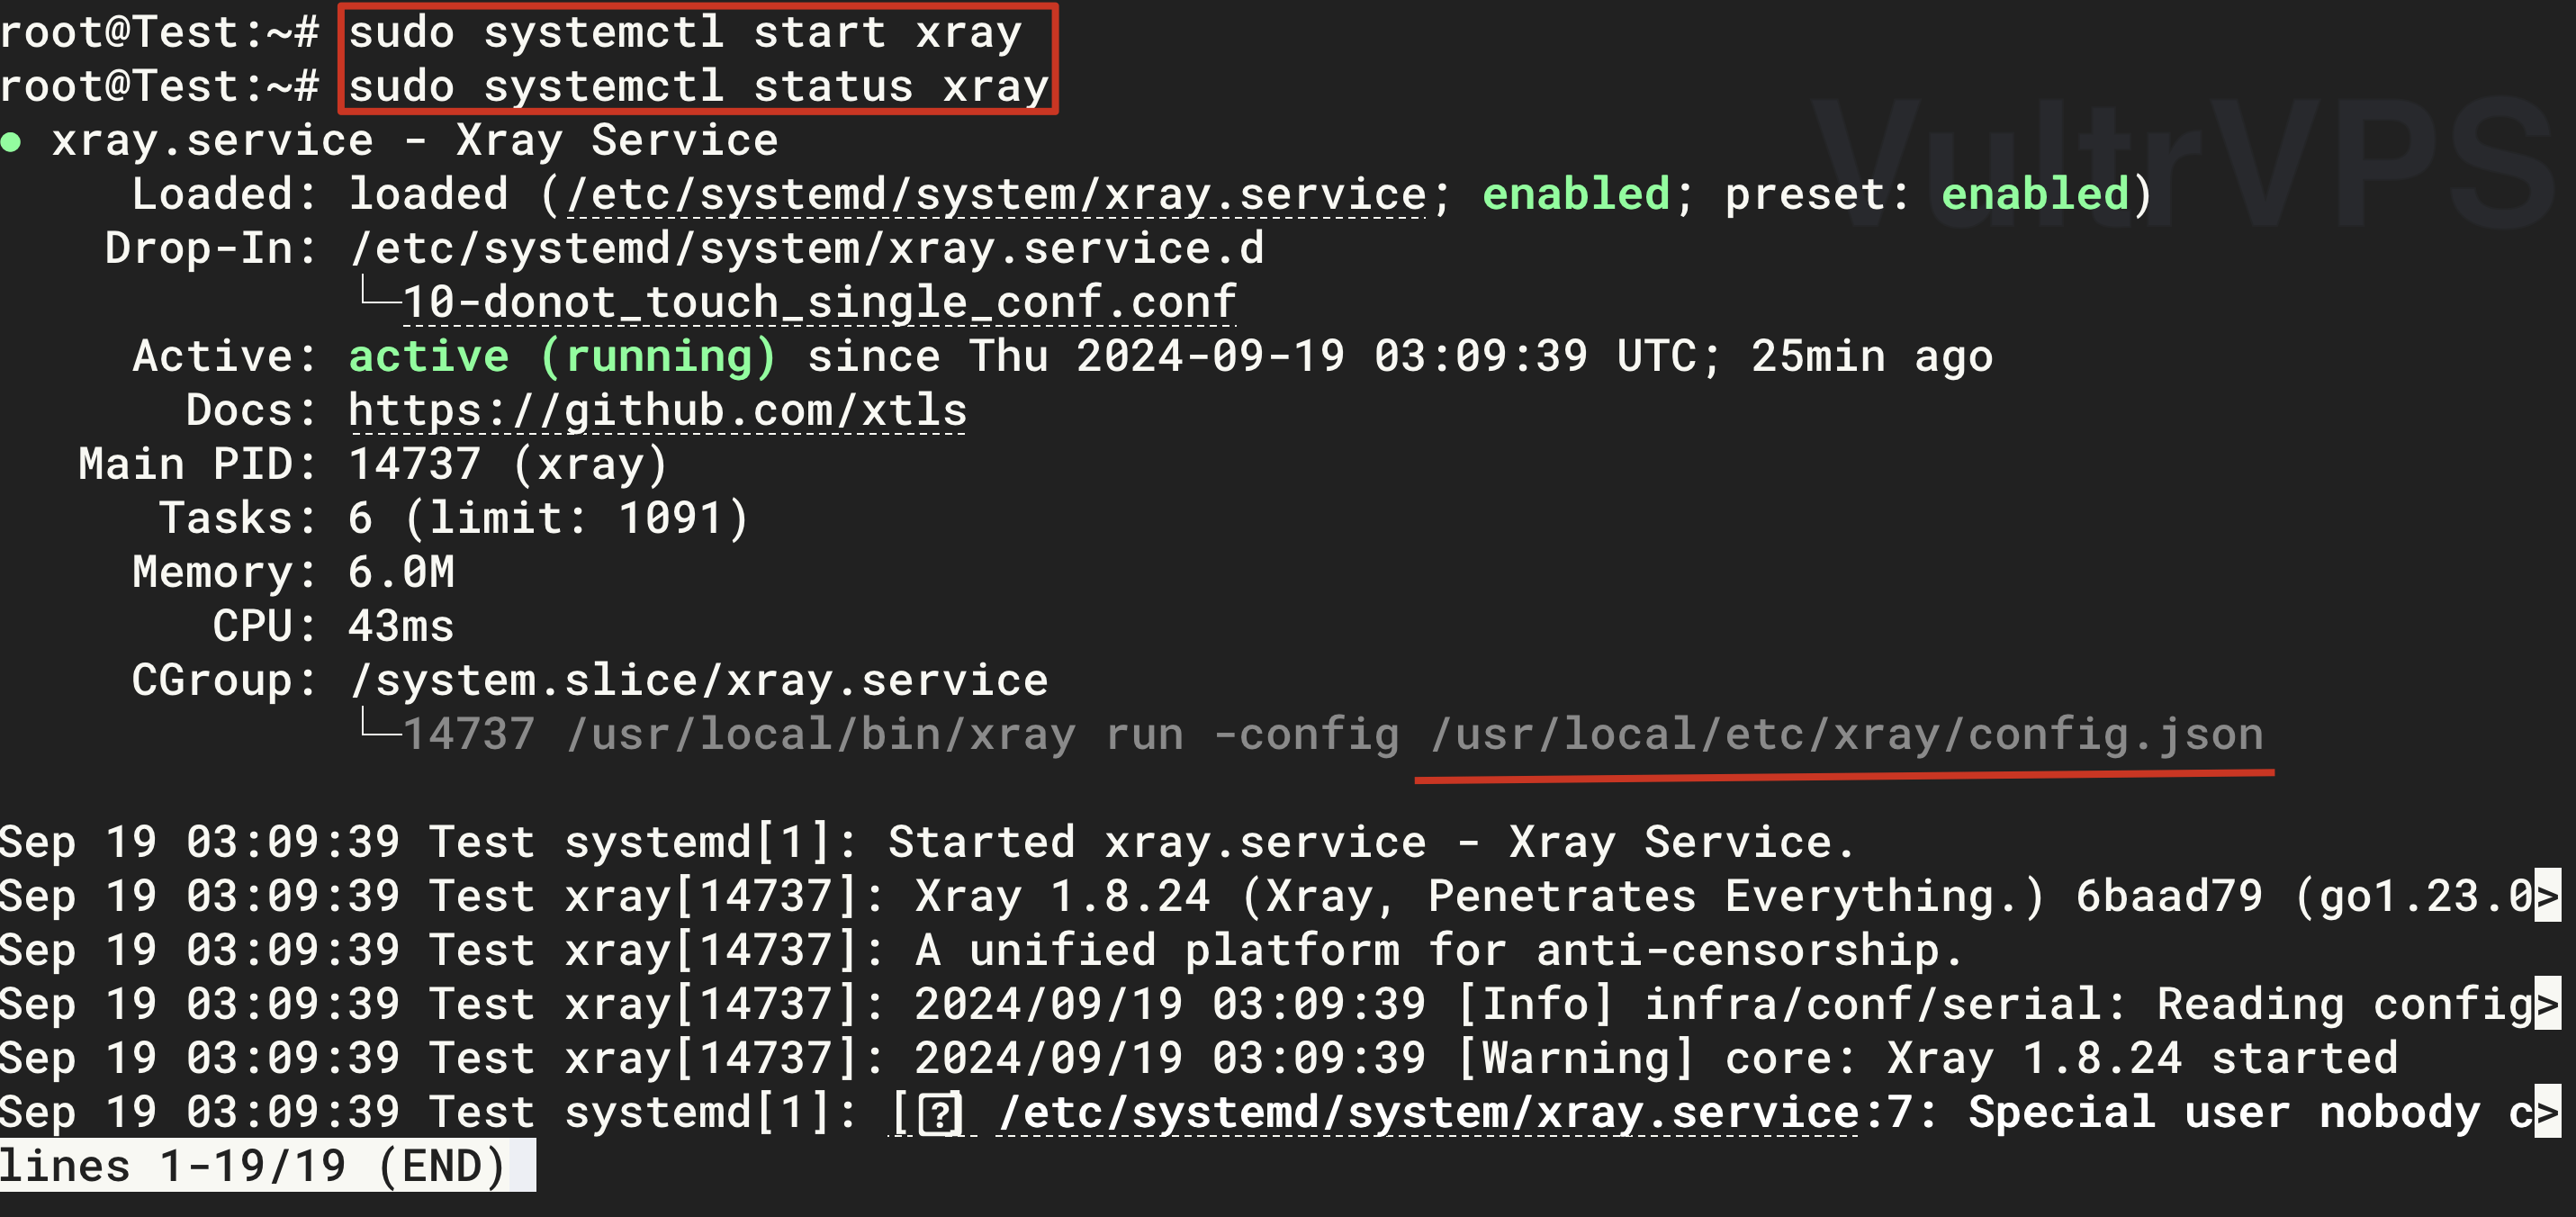
-
Enable BBR acceleration.
Add the official
backportsrepository for Debian 10 to get updated software repositories.1sudo nano /etc/apt/sources.listThen add the following line at the end, save and exit.
1deb http://archive.debian.org/debian buster-backports mainRefresh the software repository and query the latest version of the official Debian kernel and install it. Please be sure to install the version corresponding to your VPS (this article takes the more common [amd64] as an example).
1sudo apt update && sudo apt -t buster-backports install linux-image-amd64Modify the kernel parameter configuration file sysctl.conf and enable BBR.
1sudo nano /etc/sysctl.confAdd the following content
1
2
net.core.default_qdisc=fq net.ipv4.tcp_congestion_control=bbrReboot the VPS to take effect of the kernel update and the
BBRconfiguration.1sudo rebootMake sure BBR is enabled.
1lsmod | grep bbrAt this point, a result like
tcp_bbrshould be returned.If you want to confirm that the
fqalgorithm is enabled correctly, you can use the following command:1lsmod | grep fqAt this point, a result like
sch_fqshould be returned. -
Configure the client.
After the server configuration is finished, the next step is to configure your client. The configuration method varies depending on the proxy tool used by the client. But they are all based on the server configuration. The main thing is to configure
IP:Portanduuidto be consistent with the server.I won’t go into detail about the client configuration.
In this way, you can access the Internet scientifically. You just cannot use the ChatGPT client because ChatGPT blocks the IPs of these VPS manufacturers.
Warp Unlock ChatGPT Client
ChatGPT blocks the IP addresses of VPS vendors, but Cloudflare’s Warp can provide us with IP addresses, so we use the IP addresses provided by Warp to access ChatGPT. However, the IPv4 addresses provided by Warp have been abused and cannot access the ChatGPT client, so we use Warp IPv6. The goal is to use the public IPv4 address of the VPS when accessing ordinary websites, and use the IPv6 address of Warp when accessing ChatGPT.
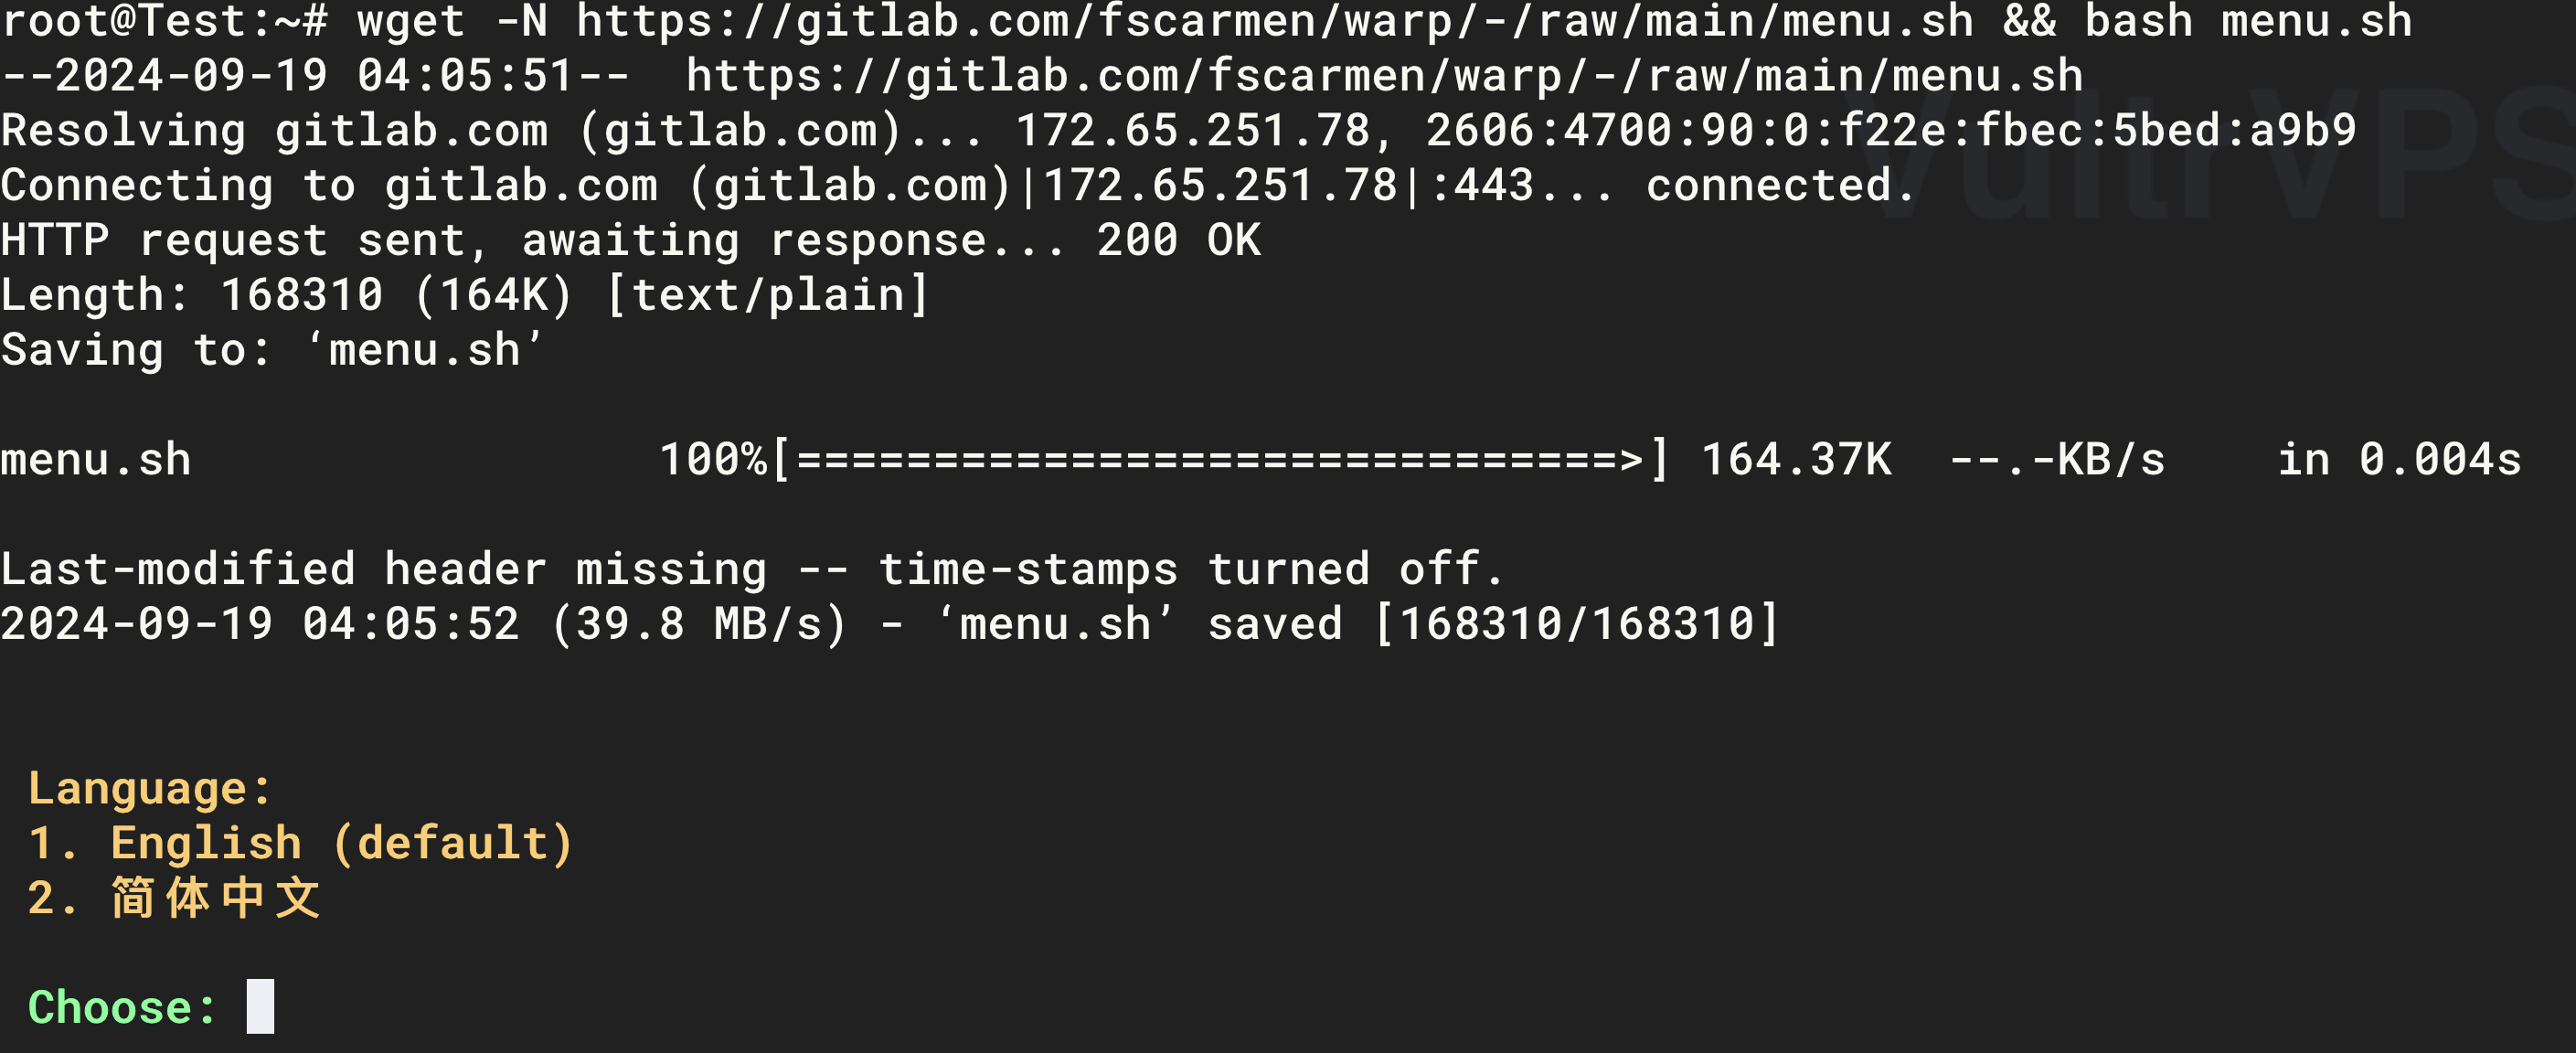
Execute the following script to install WGCF.
|
|
Select the language as needed. This article selects Chinese.
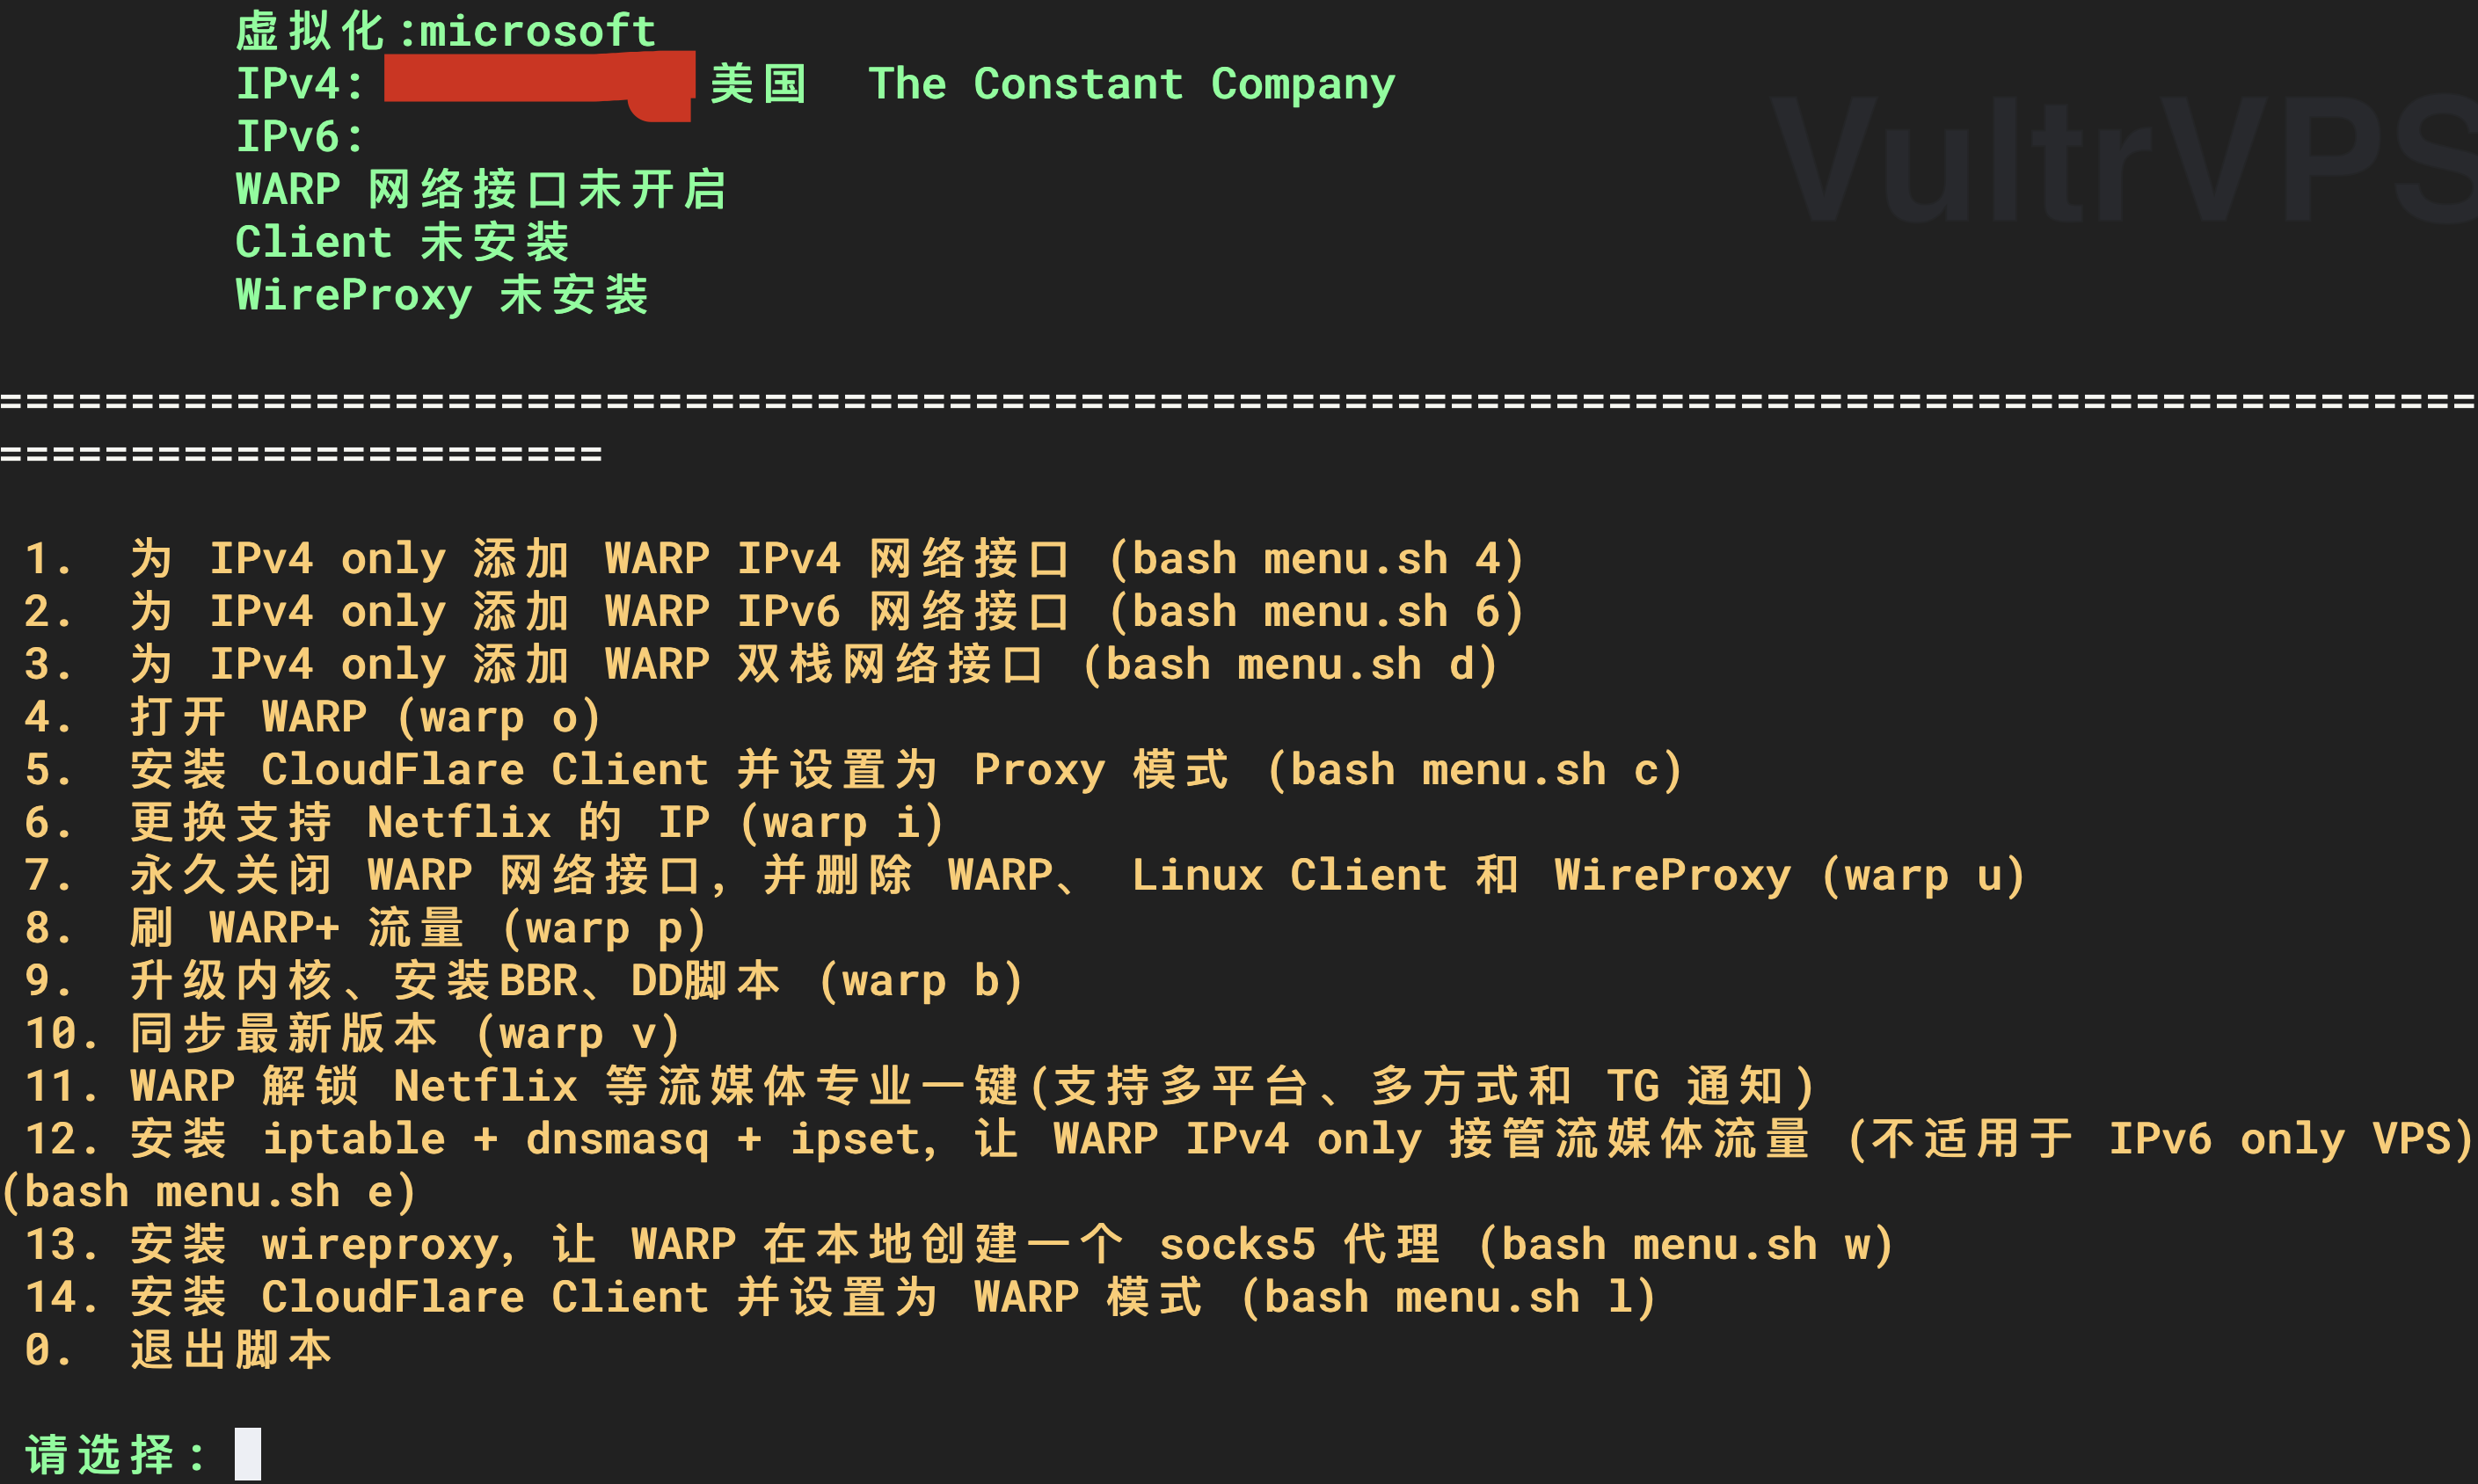
Because our VPS is an IPv4 only machine and does not have an IPv6 address, we only need Warp to provide an IPv6 address, so choose 2. Add a Warp IPv6 network interface for IPv4 only.
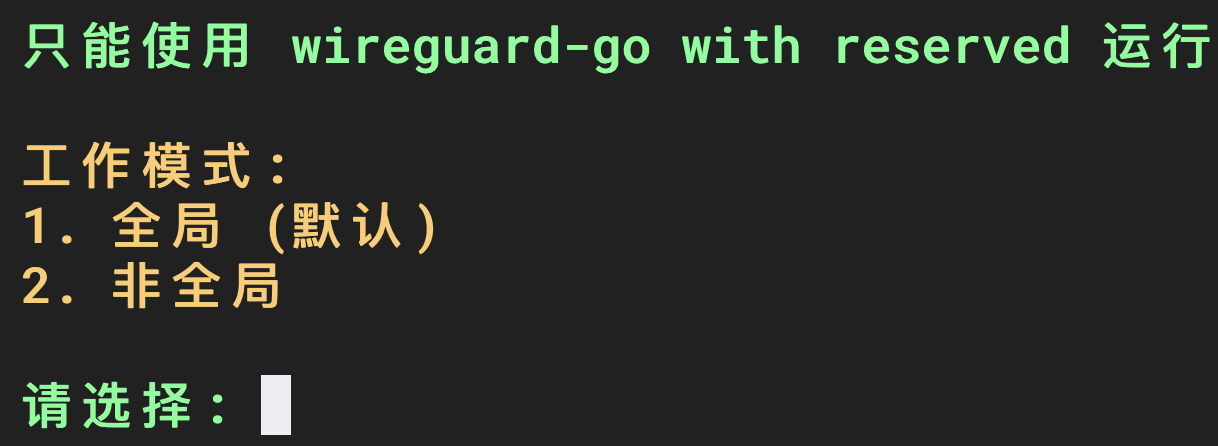
Select 1. Global (default) as the working mode.
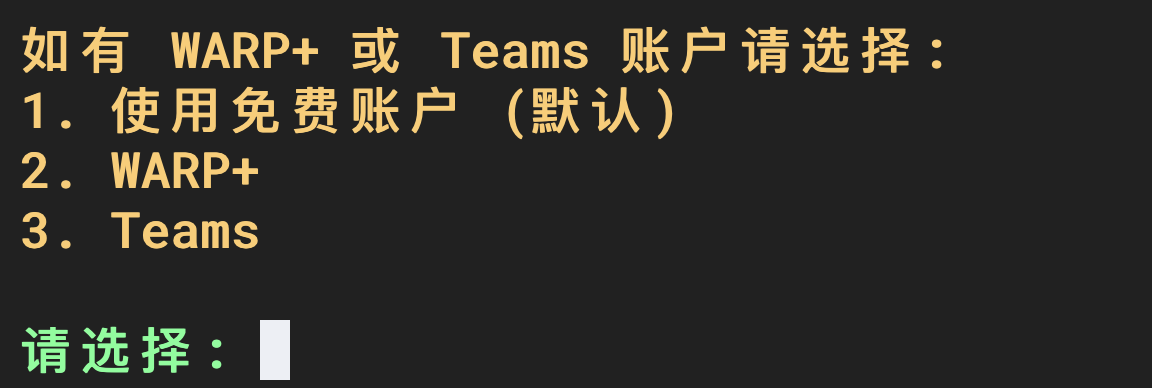
Select the account type. Choose according to your needs. I have the team version of WARP, which is Zero Trust, so I choose 3. Teams.
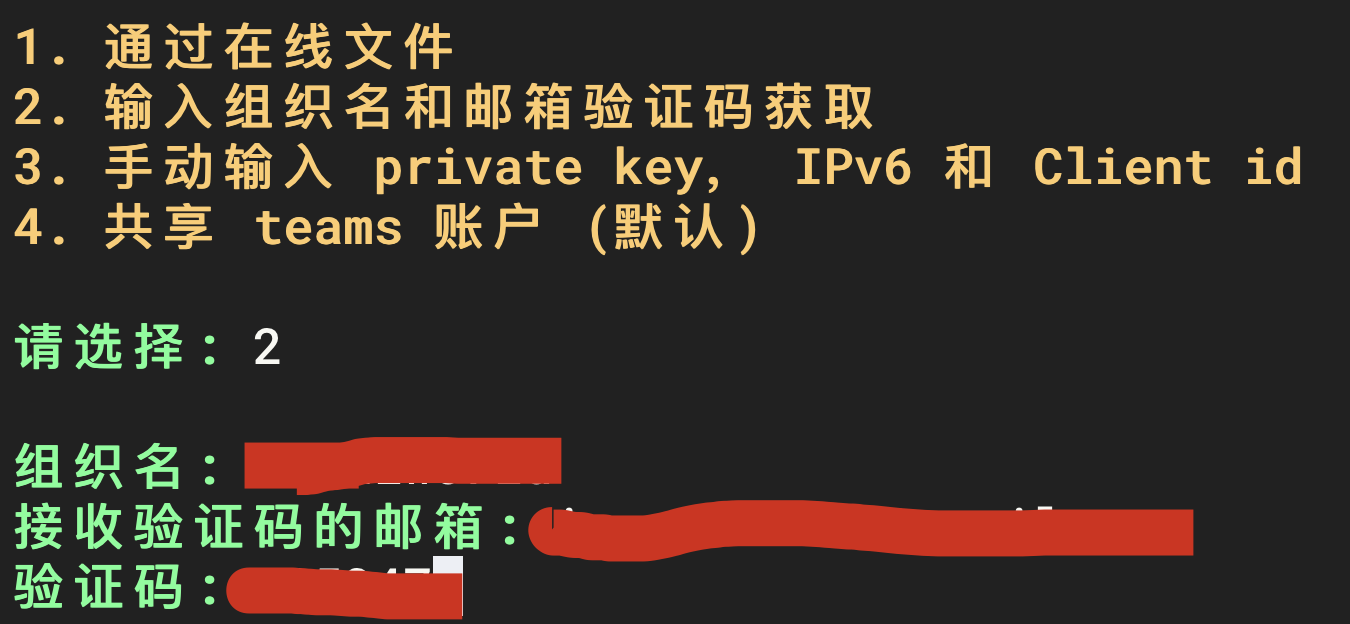
The next step is to log in to the selected account. Teams account selection 2. It is more convenient to log in by organization name and email verification code.
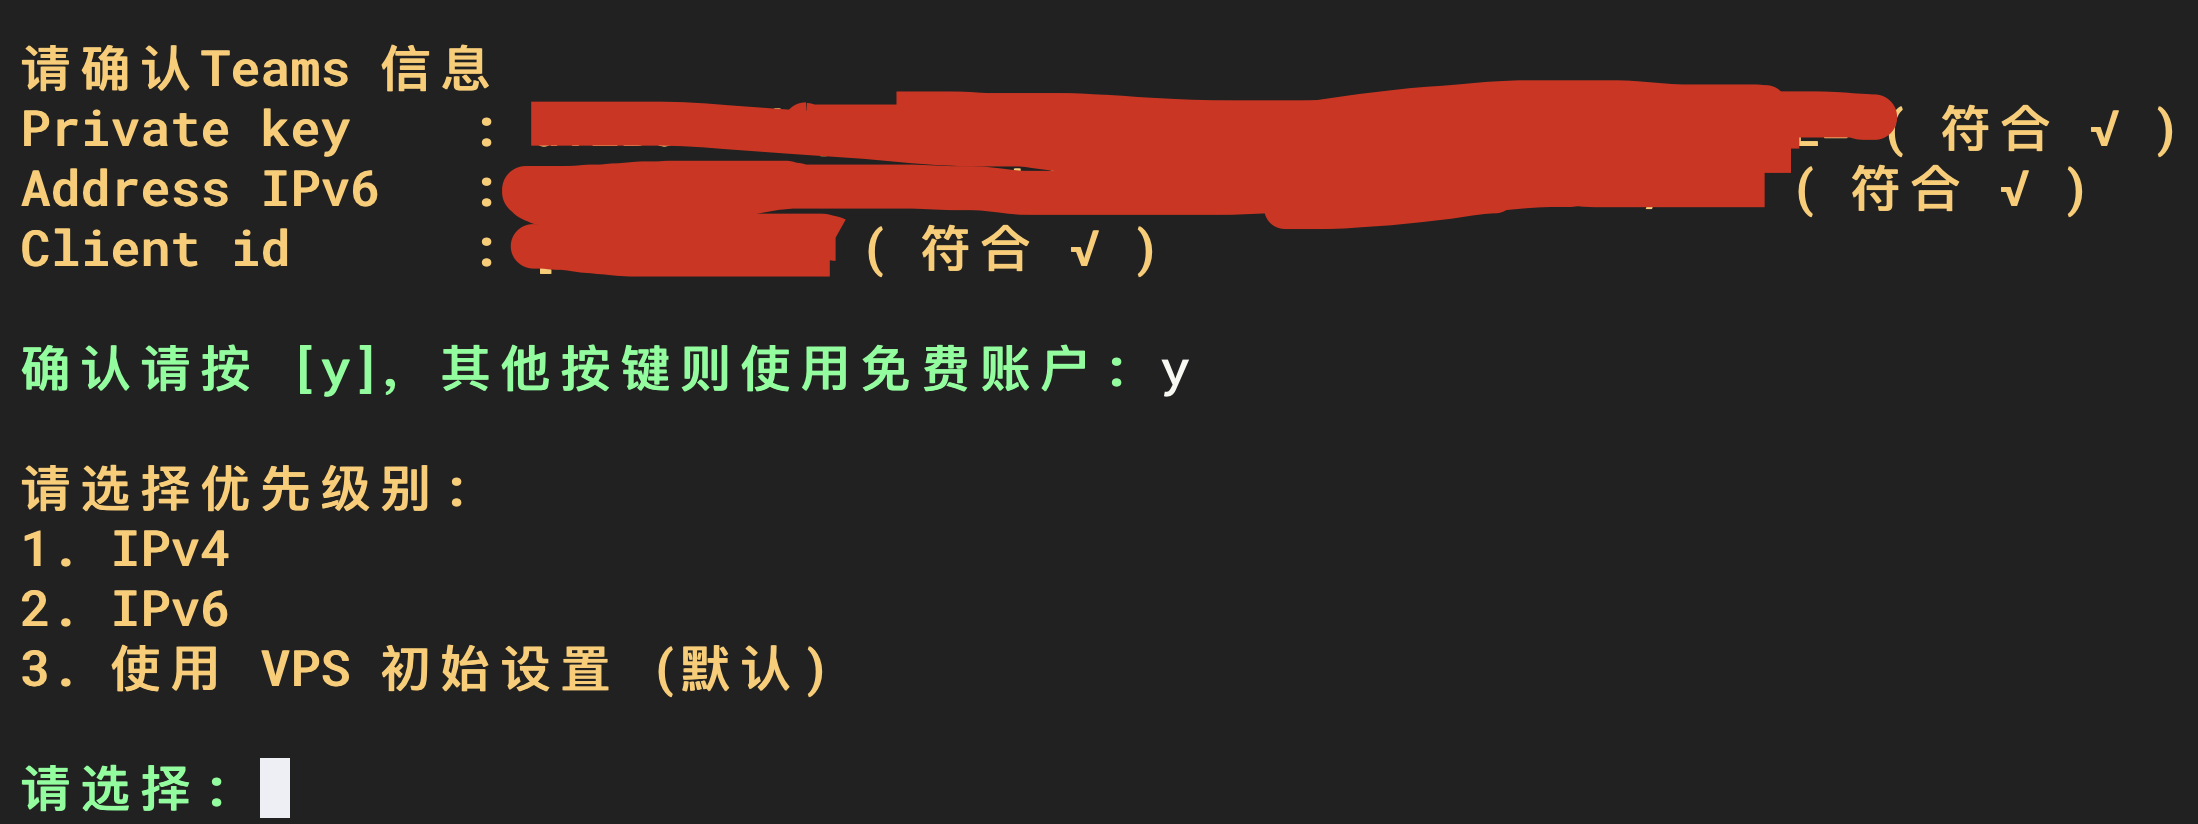
Select 3 for priority level. Use the VPS initial settings (default).
WGCF will start installing. Wait for the installation to complete and run the following command. You can see that there is a network card called warp.
|
|
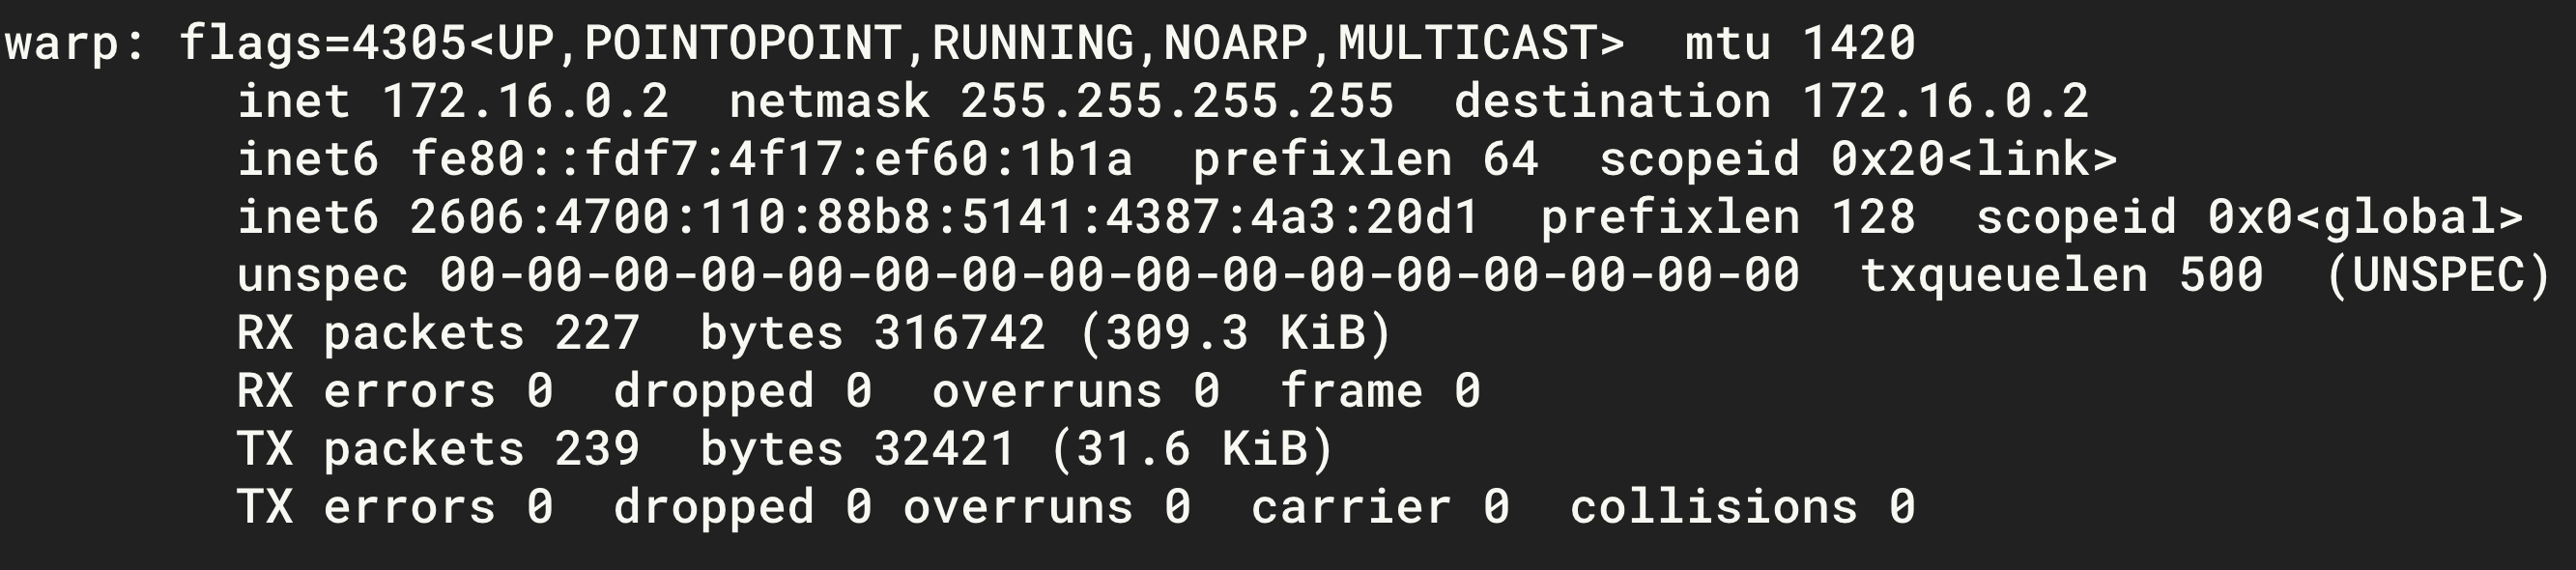
This way the VPS has an IPv6 address.
Modify the Xray configuration file
|
|
Overwrite with the following content. Replace the IPv4 address with your VPS public IPv4 address, and replace the IPv6 address with the address of the warp network card. Also replace uuid and port with your own. Leave the rest unchanged.
2025/07/18添加色情屏蔽规则。
|
|
Restart Xray and confirm that Xray has run successfully.
|
|
Connect to the node on the client and you will find that the ChatGPT client can be used normally.